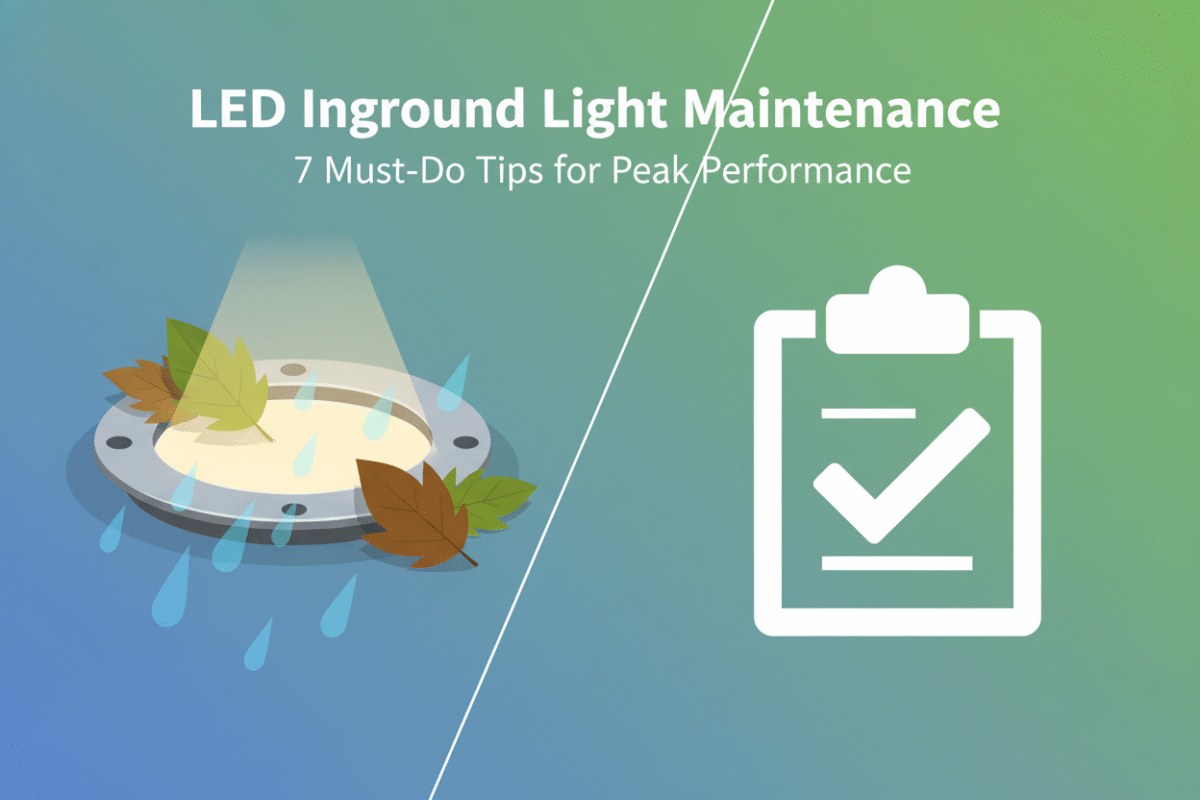
Rainstorms, pollen blitzes, sidewalk salt—outdoor ground lights take a beating. And if you’ve ever tripped on a flickering step light outside a fancy hotel or seen one mysteriously glowing red in the middle of your garden path… you know it’s not just about looks. The best way to maintain outdoor ground lights isn’t guesswork—it’s strategy. From cracked glass lenses messing with your warm white glow to gunked-up seals causing slow leaks that fry the circuitry, small things become big problems fast if ignored.
Think of LED inground lighting like owning a classic car—you don’t wait for smoke to start checking the oil. Skipping seasonal checks or ignoring waterproofing could mean re-installation headaches and warranty nightmares down the line. Maintenance doesn’t have to be overwhelming—but it does have to be smart.
Reading Notes on the Best Way to Maintain Outdoor Ground Lights
➔ Inspect Aluminum Alloy Housing Regularly: Prevent early-stage corrosion by checking housing during rainy seasons, especially in garden pathway placements where moisture builds up fast.
➔ Clean Tempered Glass Lens Monthly: Keep warm white illumination clear and uninterrupted—especially after spring pollen or sidewalk salt exposure in outdoor stairways.
➔ Tighten Stainless Steel Seals Firmly: A secure cover maintains IP67 waterproof integrity and protects sensitive components for long-term architectural accent lighting.
➔ Maintain Polycarbonate Diffuser During Seasonal Shifts: Ensures dimmable control and vibrant RGB color performance, particularly crucial in winter months for hotel landscape lighting.
➔ Use Proper Cleaning Tools Based on Your Setup: Soft cloths work for residential upkeep; commercial-grade fixtures may need pro tools to meet CE safety compliance standards.
➔ Perform Waterproof Tests Annually: Submerge die-cast aluminum bodies at low voltage settings to verify resistance against water intrusion—key for solar-powered installations.
Best Way To Maintain Outdoor Ground Lights: Core Upkeep Principles
Keeping your outdoor ground lights in shape doesn’t have to be a hassle. A few smart habits go a long way.
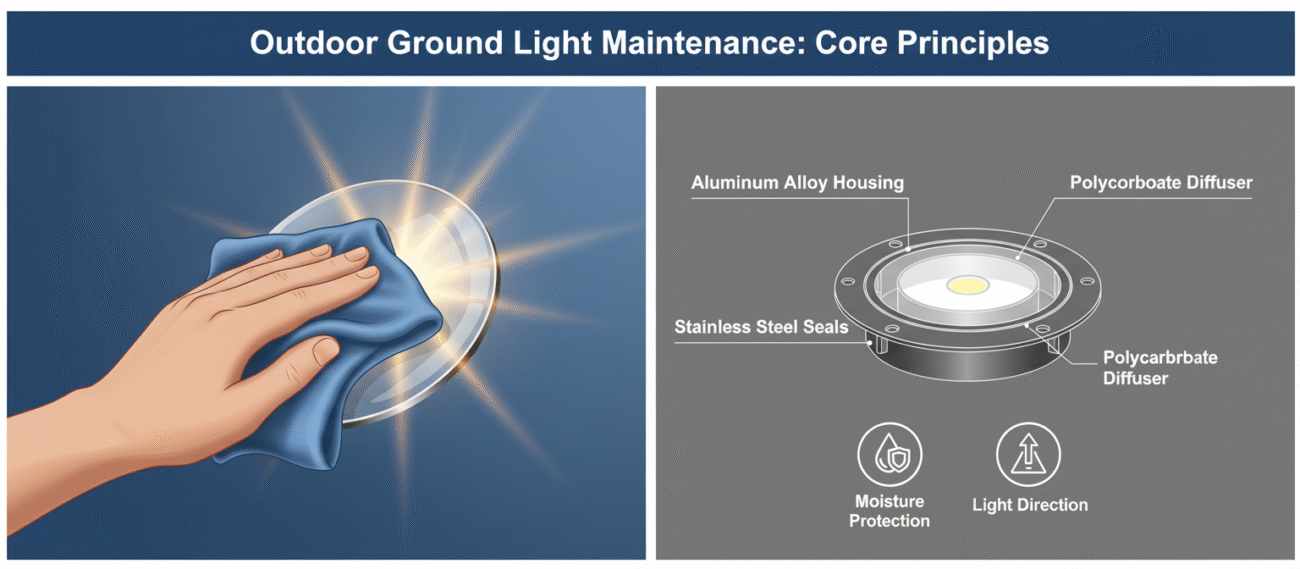
Inspect Aluminum Alloy Housing: Prevent Corrosion Early
• Check the aluminum alloy surface for any bubbling or pitting—early signs of corrosion.
• Use a soft cloth and non-abrasive cleaner to wipe down the housing every few weeks.
• If you spot rust, sand it lightly and apply a protective coat made for outdoor metals.
A quick inspection after rainstorms helps too, especially if your lights sit near sprinklers or flowerbeds. Keeping that maintenance regular means fewer surprises down the road.
Why Clean Your Tempered Glass Lens Every Month?
- Dirt buildup dims your lighting output—nobody wants murky glow on their walkway.
- A clean tempered glass lens ensures warm white tones remain crisp and inviting at night.
- Monthly cleaning avoids permanent etching from mineral deposits or bird droppings.
Grab a microfiber cloth, spritz some vinegar solution, and give those lenses a good wipe-down once a month—it’s 10 minutes well spent for better light quality.
3 Benefits of Tightening Stainless Steel Cover Seals
• Keeps moisture out: Secure stainless steel seals keep water from sneaking into electrical components during storms or lawn watering.
• Preserves light direction: Loose covers can shift angles over time; tight ones lock in your preferred beam focus for architectural accents.
• Maintains waterproof rating: Ensures that IP67 protection stays valid—no leaks, no short circuits.
A quick twist with a screwdriver every couple months keeps things snug without over-tightening.
Maintain Polycarbonate Diffuser for Optimal Dimmable Lighting Control
When your polycarbonate diffuser gets foggy or scratched up, it messes with how evenly light spreads across your yard or hotel path. You’ll notice dimming isn’t as smooth, and RGB colors may look off-kilter.
Wipe gently with soapy water using a lint-free cloth to avoid micro-scratches that scatter light weirdly. Also check if it’s seated properly—an uneven fit can throw off brightness levels even if the bulb’s working fine underneath.
Smart upkeep here means consistent cool white clarity and reliable dimmable control all year round—a must if you’re running energy-efficient drivers that need stable diffusion performance.
By sticking with these habits, you’ll get more life out of your setup while keeping everything looking sharp—and that’s really the best way to maintain outdoor ground lights without breaking stride in daily life.
Standard Vs Professional Inground Cleaning Tools
Getting your outdoor lights looking fresh again? Here’s how everyday tools stack up against pro gear when it comes to keeping those ground fixtures clean and glowing.
Standard Inground Cleaning Tools
Keeping things simple works just fine for regular upkeep. Here’s what you’re likely reaching for:
- Soft cloths wipe away dust without scratching the surface.
- A bit of mild detergent mixed in a bucket of water gets rid of grime.
- Rinse with a regular old garden hose, nothing fancy needed here.
- Use a soft sponge on lens covers—scrubbing too hard can damage the finish.
- Avoid harsh chemicals; they’ll eat away at protective coatings over time.
- Let everything air dry or pat down with a dry soft cloth for streak-free results.
Gentle cleaning doesn’t mean ineffective—just smarter for compact edging installs.
Sometimes, it’s all about frequency: wipe them down every couple weeks, especially after rain or pollen-heavy days.
You don’t need much more than water, elbow grease, and some patience to keep standard setups tidy—and that’s honestly the best way to maintain outdoor ground lights that aren’t exposed to heavy foot traffic or commercial wear-and-tear.
Professional Inground Cleaning Tools
When dealing with larger installations or fixtures embedded deep in commercial zones, basic tools won’t cut it.
• High-powered pressure washers strip off built-up residue fast—but only when used at controlled PSI settings.
• Specialized degreasing agents and eco-safe solutions work better than household soaps on stubborn stains.
1) Start by inspecting the fixture using an inspection camera, especially if it’s been buried under debris or mulch.
2) Apply targeted cleaners with an extended wand—this keeps your hands clean and out of tight spaces.
3) Use durable, long-handled professional brushes to reach awkward angles without damaging seals.
“According to the 2024 Global Outdoor Lighting Maintenance Report by LumaTech Insights, commercial-grade lighting systems cleaned bi-monthly using certified methods showed 37% longer lifespan than those cleaned manually with household products.”
Break out the full kit if you’re managing high-end architectural lighting or public installations where CE safety compliance is non-negotiable.
Routine checks paired with proper tools like protective gloves and post-cleaning sealants not only preserve brightness but also prevent corrosion—definitely part of the best way to maintain outdoor ground lights in high-demand environments like parks or retail walkways.
And yeah, even MG Lighting units benefit from this kind of TLC once they’re installed in busy zones!
Three Steps To Seal Lenses Perfectly
Getting a watertight seal on outdoor ground lights isn’t just about looks—it’s about longevity and safety. Here’s how to get it right every single time.
Step 1: Remove Debris and Dirt from Aluminum Alloy Housing Edges

• Use a soft-bristle brush or microfiber cloth to gently sweep away loose debris and embedded dirt.
• Focus on the aluminum alloy housing edges, where buildup often hides in corners.
• Apply isopropyl alcohol with a lint-free pad for deeper cleaning without scratching the surface.
• Inspect for corrosion or pitting—any damage here can compromise sealing later on.
Regular maintenance like this is the best way to maintain outdoor ground lights, especially when they’re exposed to unpredictable weather.
Step 2 – Apply Silicone Sealant Evenly Around Tempered Glass Lens
➊ Choose a high-grade, UV-resistant silicone sealant designed for outdoor use.
➋ Gently press the nozzle at an angle and move slowly around the entire perimeter of the tempered glass lens—even pressure matters here.
➌ Avoid over-application; excess sealant can interfere with installation or create uneven surfaces that trap water instead of repelling it.
This process helps ensure your lights stay leak-free, which is essential if you’re aiming for long-term protection and clean aesthetics on deck-mounted installs.
Step 3 — Test Pressure and Secure Stainless Steel Cover
★ Before final assembly, conduct a basic air pressure test using a handheld pump gauge—this checks internal resistance against leaks without needing fancy equipment.
★ Once verified, align and tighten the mounting screws on the stainless steel cover, applying even torque across all points using an L-key or precision driver toolset.
This combo ensures not just water resistance but also structural stability—especially important when dealing with UL-listed lighting units in public spaces.
Scientific Table – Common Failures Without Proper Sealing
| Failure Type | Cause | Frequency (%) | Prevention Method |
|---|---|---|---|
| Water Ingress | Uneven sealant application | 42 | Use continuous bead & verify coverage |
| Lens Fogging | Residual moisture inside | 26 | Dry lens before sealing |
| Rust Formation | Dirty housing edges | 19 | Clean thoroughly before sealing |
| Loose Covers | Incorrect torque during fitment | 13 | Use calibrated tightening tools |
These issues are common when folks skip steps or rush through them—don’t cut corners if you want your lights to last.
Fast Fixes That Don’t Work Long-Term
– Taping over gaps? It peels off within weeks under sun exposure.
– Using household glue instead of proper outdoor-rated sealants? It cracks under temperature swings.
– Skipping cleaning because “it looks fine”? Hidden grime wrecks seals from underneath.
None of these shortcuts are part of the best way to maintain outdoor ground lights—and they’ll cost more down the line than doing it right now.
Micro-Maintenance Habits That Make All The Difference
Short weekly habits can save hours later:
• Quick wipe-down after rain keeps edges cleaner longer
• Monthly visual inspection for peeling sealant or fogging lenses
• Re-tightening visible covers every quarter prevents vibration loosening
These micro-checks are easy enough that even busy facility managers can keep things running smooth without calling in backup constantly.
Why MG Lighting’s Design Makes This Process Easier
MG Lighting products come pre-engineered with user-friendly features:
- Precision-machined housing edges reduce debris retention zones.
- Beveled grooves around each tempered glass lens guide uniform sealant flow.
- Reinforced screw ports allow secure seating of each stainless steel cover, ensuring lasting durability even under heavy foot traffic.
That’s why many pros consider MG Lighting gear among their top picks when figuring out the best way to maintain outdoor ground lights efficiently—less fuss, more uptime.
Best Way To Maintain Outdoor Ground Lights: Test Waterproof Ratings
Keeping your outdoor ground lights performing like champs means testing their waterproof ratings the right way. Here’s how to do it without breaking a sweat.
Step 1: Submerge Die-Cast Aluminum Body in Low Voltage for IP67 Test
- Start by making sure the light’s outer casing is made with a solid die-cast aluminum body—this helps prevent water seepage.
- Use a low-voltage power supply during testing to avoid damaging internal components while ensuring safety.
- Carefully lower the fixture into water for at least 30 minutes, keeping depth around one meter for accurate simulation of real-world conditions.
- Check that all seals hold up under pressure—no bubbles, no leaks.
- This test confirms your gear meets the IP67 standard, which is crucial when choosing lighting for patios, driveways, or any other area where puddles are common.
MG Lighting’s products often pass this stage with flying colors thanks to their tested build quality and weatherproof design.
How to Spot Leaks in Stainless Steel Cover Gaskets After Garden Pathway Tests?
Multiple signs can indicate gasket failure after prolonged exposure:
• Moisture trapped beneath the lens or inside housing? That’s your first red flag.
• Rust or corrosion forming around the edges of the stainless steel cover? Time to investigate.
• Light flickering or dimming unexpectedly? Could be water messing with internal circuits.
If you notice any of these issues post-rainfall or irrigation cycles along your garden pathway, it might be time to replace those gaskets. Ensuring tight seals helps maintain both aesthetic appeal and electrical safety across your outdoor setup.
Evaluate Dimmable Lighting Control Post-Water Exposure
Short bursts of moisture shouldn’t mess with your dimmable settings—but if they do, here’s what you need to check:
- Is your control unit still responding smoothly when adjusting brightness levels?
- Do lights retain memory presets after cycling power?
- Are there sudden jumps or flickers during dimming transitions?
A recent report from Energy Efficiency Insights April 2024 edition noted that “over half of dimmable outdoor lighting failures stem from compromised insulation following water intrusion.” So if you’re aiming for smooth ambiance along walkways or public park installations, make sure post-exposure testing includes full-range dimmer checks.
Maintaining peak performance starts with understanding how water affects every part—from housing integrity to electronic control stability—in your ground lights setup.
By consistently applying tests like these across various fixtures and materials, you’ll find the best way to maintain outdoor ground lights without constant replacements or performance dips.
Which Season Demands Rigorous Ground Light Checks?
Keeping outdoor lighting sharp and safe isn’t just about wattage—it’s all about timing. Each season brings its own curveballs, so let’s break down what to watch for.
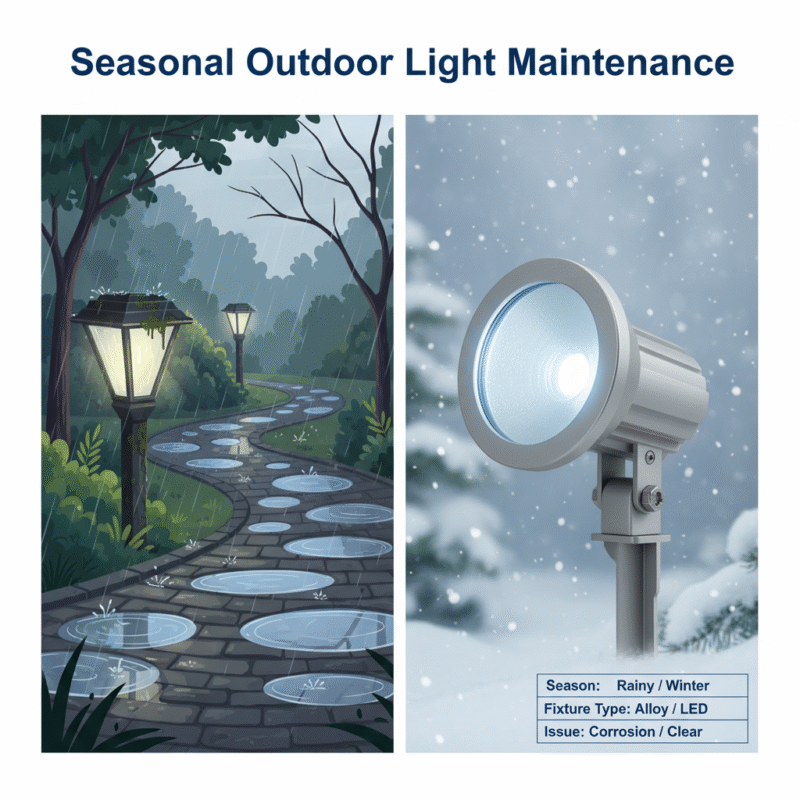
Rainy Season Checks on Aluminum Alloy Housing in Garden Pathway Placement
✔️ Rainy Season means puddles, splashes, and soaked soil—bad news if your ground lights aren’t sealed tight.
✔️ Look closely at the Aluminum Alloy Housing for bubbling paint or white powdery spots—early signs of corrosion.
✔️ A quick test with a moisture meter around the fixture base can reveal drainage issues you might miss by eye.
💧 Poor water runoff = trapped moisture = early death for your lights. Make sure the Garden Pathway Placement avoids low spots where water collects after storms.
• Don’t forget to check rubber gaskets and seals—one crack can let rain sneak into your low voltage setup.
• Use silicone caulking around the housing base if mounting into gravel or mulch beds that shift during heavy rain.
In commercial spaces, this kind of seasonal prep helps maintain stable DC voltage input and keeps those walkways glowing without flicker or failure.
Want Optimal Cool White Brightness in Winter? Inspect Polycarbonate Diffuser
When snow hits the ground, that crisp glow from cool white LEDs becomes essential—but only if your fixtures are clean and intact.
- Wipe down each Polycarbonate Diffuser with a microfiber cloth soaked in diluted isopropyl alcohol.
- Check for yellowing—common when UV exposure combines with freezing temps.
- Shine a flashlight through the diffuser; cloudy patches mean it’s time for replacement.
- Gently press along edges to detect brittleness or micro-cracking caused by thermal expansion.
- If you’re running RGB color-changing modes, ensure no cracks interfere with light blending.
Winter inspections also help you catch misaligned beams caused by frost heave shifting the housing slightly underground.
Grouped spotlight fixtures used in hotel landscape lighting often rely on adjustable beam direction, which winter freeze-thaw cycles can subtly nudge off course—leading to uneven illumination patterns across gardens or facades.
| Fixture Type | Common Issue (Winter) | Recommended Action | Frequency |
|---|---|---|---|
| Polycarbonate Lens | Yellowing | Replace diffuser | Annually |
| RGB Spotlights | Beam misalignment | Reposition & tighten | Bi-monthly |
| Uplight Fixtures | Ice damage | Inspect seals | After snowfall |
Spring Pollen Cleaning of Tempered Glass Lens on Outdoor Stairways
Spring doesn’t just bring flowers—it dumps pollen everywhere like nature’s version of glitter… especially on outdoor stair lighting.
• A dirty Tempered Glass Lens cuts visibility way down at night—not great when safety’s on the line.
• Use a soft-bristle brush first to knock off loose debris before applying any cleaner (you don’t want to scratch it).
• Follow up with a streak-free glass spray designed for high-transmission surfaces—some even have anti-static properties that repel dust longer.
Pollen buildup also affects light transmission quality, making even powerful LEDs look dimmer than they are—and nobody wants their recessed stair lights looking weak during spring parties or patio season events.
Split this job into zones:
- Upper stairs near trees? Clean weekly.
- Lower steps near foot traffic? Bi-weekly should do.
- Covered areas? Monthly checks are fine unless windblown allergens sneak in.
And yes, CE safety compliance requires clear optics—so keeping lenses spotless isn’t just about looks; it’s regulation too when architectural accent lighting is involved.
By syncing maintenance routines with seasonal shifts, you’re not just finding the best way to maintain outdoor ground lights—you’re making sure they stay beautiful and functional year-round without drama or downtime.
FAQs about Best Way to Maintain Outdoor Ground Lights
How do I keep outdoor ground lights working well during rainy months?
Rain has a way of finding every weak point. To stay ahead:
- Check the aluminum casing for early signs of rust or pitting—especially near seams and joints.
- Gently wipe down the stainless steel cover after storms; trapped moisture can sneak in over time.
- Confirm that all seals are tight, especially around wiring entry points. One loose screw could invite a flood.
It’s not just about keeping things dry—it’s about making sure your lighting stays beautiful and functional when nature tests it most.
Why should I care if the stainless steel covers are tightly secured?
Because one tiny gap is all it takes. A loose cover doesn’t just let in water—it throws off light direction, ruins internal components, and shortens lifespan dramatically. Tightening those covers isn’t busywork; it’s how you protect your investment from slow destruction.
And for commercial spaces like hotel courtyards or public walkways, reliability matters even more—no one wants flickering steps underfoot on a rainy night.
What’s the right way to clean tempered glass lenses without scratching them?
Tempered glass looks tough—but treat it wrong, and clarity fades fast:
- Use only soft microfiber cloths with mild soap diluted in warm water.
- Avoid abrasive pads or harsh cleaners—they leave behind invisible scratches that scatter light unevenly.
- Clean monthly during pollen season (springtime especially), since buildup dulls brightness quickly.
Think of it as cleaning your windows—not because they’re dirty enough to notice yet, but because clear light makes everything feel safer and more welcoming at night.
Can I test waterproof performance before buying lots of units?Yes—and you absolutely should if you’re planning a big project. Submerge one sample unit partially under controlled low-voltage power for 10–15 minutes. Look closely afterward: any fogging inside the lens or corrosion along edges means trouble ahead.
This kind of pre-check helps avoid costly mistakes later when dozens—or hundreds—of fixtures go into place across gardens or pathways where replacement isn’t easy once installed.
How do winter conditions affect polycarbonate diffusers on outdoor lights?Cold snaps don’t just make us shiver—they stress materials too. Polycarbonate diffusers can contract slightly in freezing temperatures, which may cause hairline gaps around seals if not properly fitted beforehand. That leads to condensation build-up inside the fixture—a silent killer for LED longevity and color accuracy alike.
If you’re using RGB features near hotel entrances or walkway borders, check each diffuser mid-winter for clouding or dimming shifts…because nothing spoils ambiance faster than patchy colors glowing through frosted plastic where crisp hues used to shine bright.