Turn stairs into showstoppers with How to Install Outdoor Step Lights + 7 Best Layout Ideas—perfect for bulk buyers chasing dazzling first impressions.
You ever walk up a fancy hotel stairway at night and feel like you’re in a movie scene—soft lights guiding your steps, casting long shadows like something out of noir cinema? That’s no accident. It’s strategy. How to Install Outdoor Step Lights + 7 Best Layout Ideas isn’t just a tutorial—it’s the blueprint for turning any staircase into an experience.

When you’re managing multiple properties or outfitting commercial spaces, lighting isn’t just about safety—it’s about first impressions that stick. According to Allied Market Research, the outdoor LED lighting market is projected to hit $25.3 billion by 2031. Folks aren’t just buying bulbs—they’re investing in ambiance.
One misstep with wiring or awkward placement, though? You’ve got yourself an expensive trip hazard—or worse—a bad Yelp review waiting to happen.
So if you’re aiming for “Wow” instead of “Why?” this guide’s got what you need: tools, wiring know-how, mounting hacks—and seven layout designs that don’t miss.
How to Install Outdoor Step Lights: A Step-by-Step Guide
Outdoor step lighting isn’t just about safety—it’s about style, too. Here’s how to install outdoor step lights the right way, without blowing a fuse or your budget.

Essential Tools for the Job
Before you get started on installing outdoor step lights, stock up on these must-haves:
- Drill with masonry or wood bits depending on surface
- Wire strippers for prepping low-voltage lines
- Assorted screwdrivers, both flat-head and Phillips
- Voltage tester to confirm circuits are safe before wiring
- A solid pair of pliers—you’ll use them more than once
- Flexible measuring tape for accurate spacing between lights
- Protective gear like safety glasses, especially if drilling into concrete
Having these tools handy will make setting up your outdoor stair lighting smoother and safer—no scrambling mid-job.
Step-by-Step Wiring Process Explained
Wiring low-voltage outdoor step lights might sound intimidating, but it’s easier than you think—just keep it organized and safe.
• Start by switching off power at the main circuit breaker. No exceptions here.
• Mount your low-voltage transformer near an accessible outlet.
• Run your low-voltage wire from the transformer along your planned route—keep it tucked safely away from foot traffic.
• Splice wires using waterproof wire connectors, ensuring no copper is exposed.
• Test voltage at each connection point using a reliable multimeter to avoid any unexpected voltage drop issues later.
Pro tip? Keep your wire runs under 100 feet per circuit when possible—anything longer could cause dimming.
As reported by Electrical Safety Foundation International in early 2024, nearly 60% of DIY electrical mishaps stem from improper splicing or ignoring voltage compatibility. So yeah, don’t skip those steps.
How to Securely Mount Your Step Lights
Mounting isn’t just hammering stuff in place—it’s about making sure your setup survives both storms and stomping feet.
Grouped mounting options based on surface type:
Wooden Steps:
– Use standard screws with matching-size pilot holes drilled beforehand using sharp drill bits
– Go for either recessed installation or attach via discreet surface-mount plates with included hardware
Concrete/Brick Steps:
– Use heavy-duty wall plugs or plastic anchors before inserting screws through metal or plastic mounting brackets
– Apply construction-grade outdoor-safe adhesive if drilling isn’t ideal
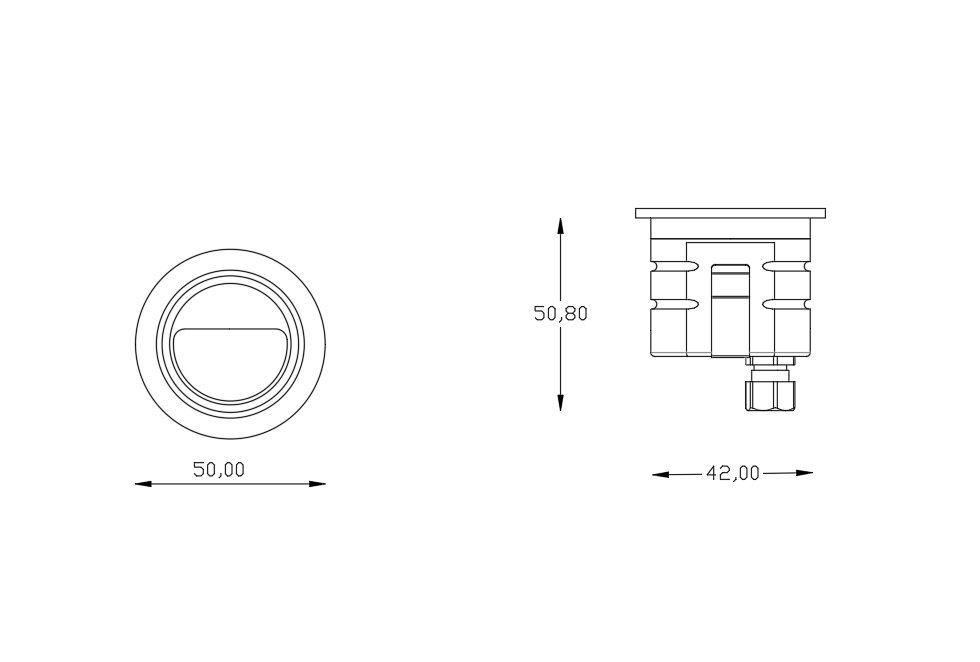
No matter what surface you’re working with, always use corrosion-resistant fasteners and weather-rated fixtures like those offered by Mg Lights—they hold up even in harsh climates.
Common Mistakes to Avoid During Installation
Even seasoned DIYers trip up sometimes when learning how to install outdoor step lights. Here’s what trips people up—and how not to fall into those traps:
- Overloading the transformer? That’s a rookie move. Always calculate total wattage first.
- Loose connections cause flickering nightmares—double-check every splice.
- Don’t ignore drainage; water damage kills more outdoor light setups than bad wiring.
- Placing lights too close together makes steps look like an airport runway; space them evenly.
- Skipping code compliance can cost you big time during home inspections.
Keep these in mind and you’ll avoid unnecessary repairs—or worse—a complete do-over down the line.
By steering clear of these common pitfalls and following best practices, you’ll end up with a clean-looking setup that actually works as great as it looks—and lasts just as long too.
How to Choose the Right Step Lights for Your Space
Finding the perfect step lights isn’t just about brightness—it’s about safety, style, and smart choices. Let’s break it all down.
LED vs. Traditional Bulbs: Which is Better?
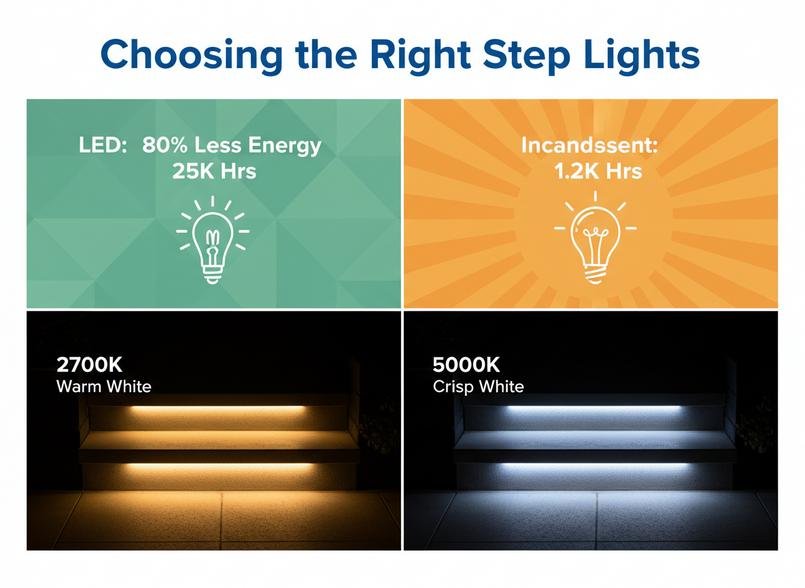
Choosing between LED and incandescent bulbs depends on what matters most: efficiency or ambiance. Here’s a quick look at how they compare:
| Feature | LED Bulbs | Incandescent Bulbs | Verdict |
|---|---|---|---|
| Energy Efficiency | Up to 80% less energy usage | High power consumption | LED wins |
| Lifespan | ~25,000 hours | ~1,200 hours | LED lasts longer |
| Brightness Options | Wide range | Limited | Tie |
| Maintenance | Low | Frequent bulb changes | LED again |
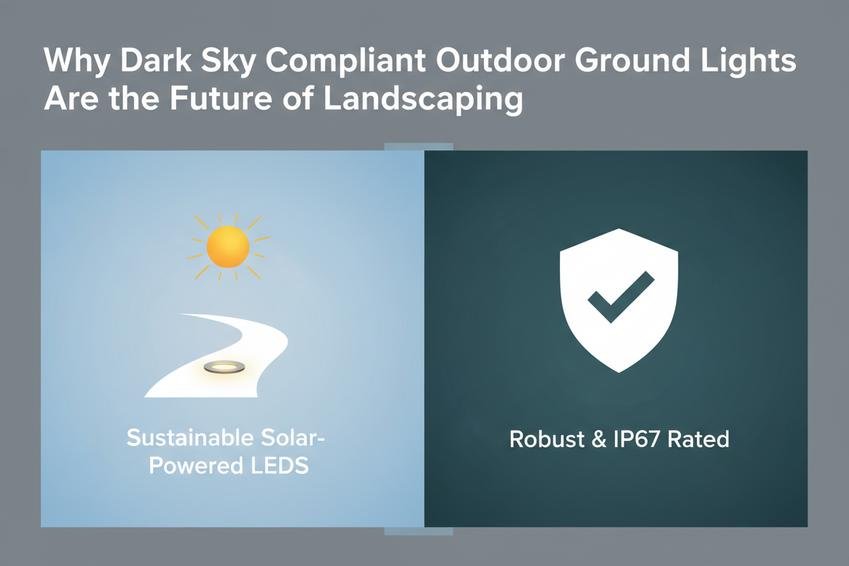
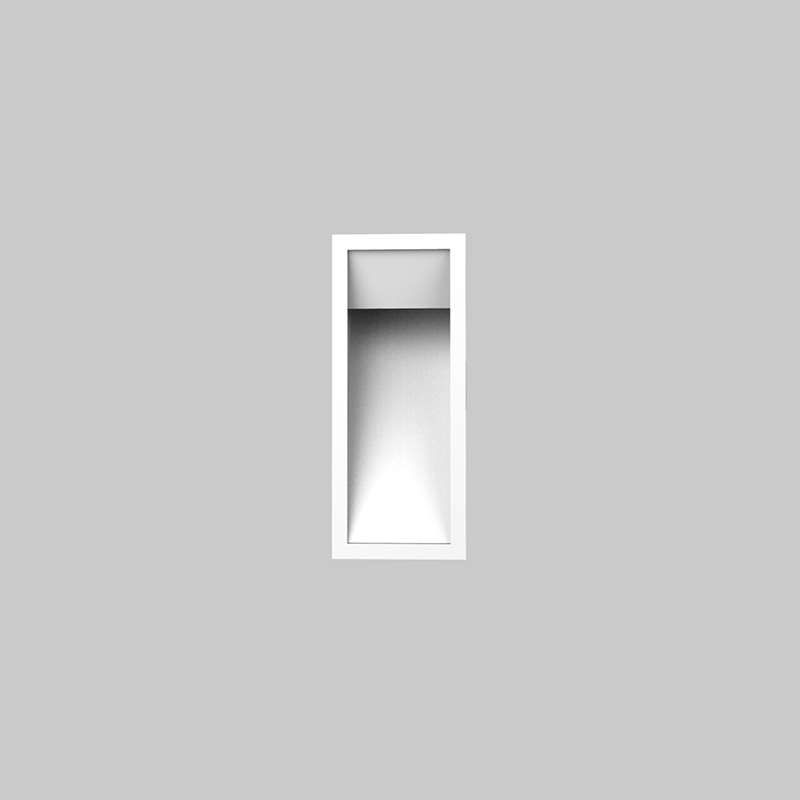
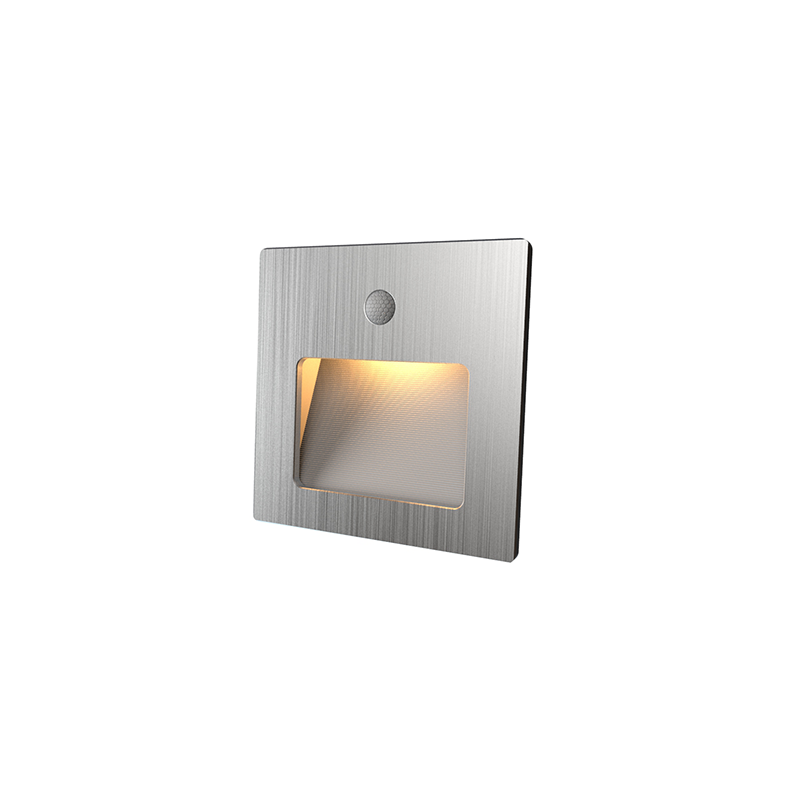
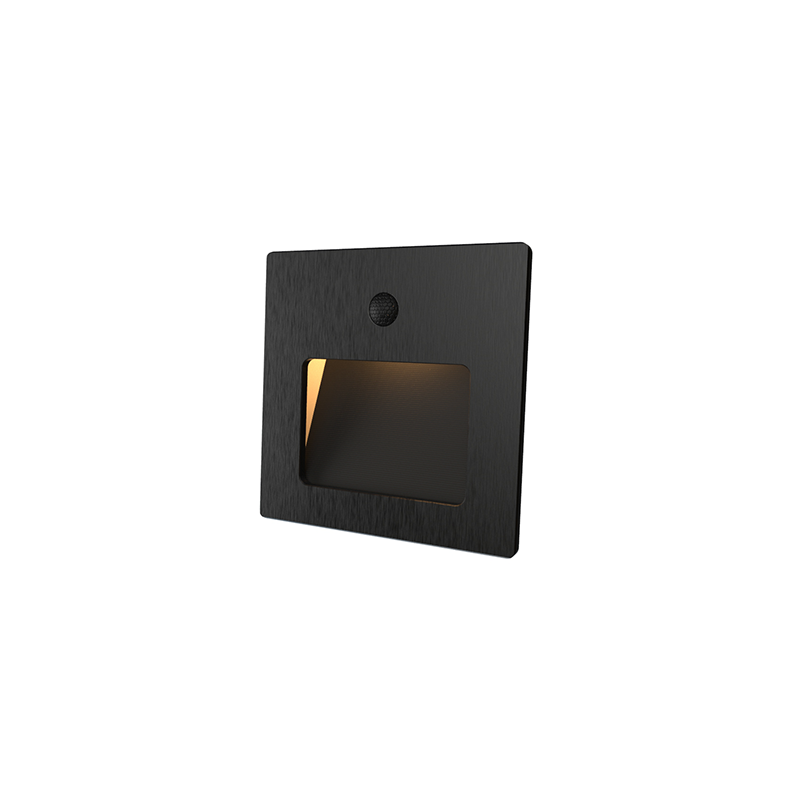
For outdoor step lighting setups like those featured in “How to Install Outdoor Step Lights + 7 Best Layout Ideas,” LEDs are a no-brainer. They’re not only easier on your wallet over time but also reduce hassle with fewer replacements. Mg Lights offers premium-grade LEDs that balance performance and design without compromise.
Tips for Assessing Your Lighting Needs
Before you start wiring up anything, take stock of your actual needs:
- Safety: Are there dark stairways or uneven surfaces? Prioritize clear visibility.
- Size & Coverage: Measure each stair width and count steps—this affects how many fixtures you’ll need.
- Power Source: Will you use solar-powered, low-voltage wired, or battery-operated lights?
- Light Intensity: Consider whether soft glow or high-brightness lighting suits your space better.
- Placement Strategy: Avoid placing lights directly into eye lines; angle them subtly downward.
When planning around “How to Install Outdoor Step Lights + 7 Best Layout Ideas,” these factors help avoid over-lighting or awkward shadows while boosting both function and curb appeal.
Color Temperature: Finding the Right Ambiance
The vibe of your outdoor steps depends heavily on the right color tone. Think beyond brightness—think mood.
• A lower Kelvin rating (~2700K) gives off a cozy, golden hue—perfect for patios or garden stairs where warmth matters.
• A higher Kelvin (~5000K) emits crisp white light that enhances visibility—great for security-focused areas like front entrances or poolside steps.
If you’re inspired by any layout from “How to Install Outdoor Step Lights + 7 Best Layout Ideas,” match each setup’s intention with its ideal tone. For example, deck stairs leading into a lounge area benefit from warm white tones, while side-yard access paths may need cool white clarity.
Choosing the proper color temperature isn’t just technical—it’s emotional design done right with subtlety and care.
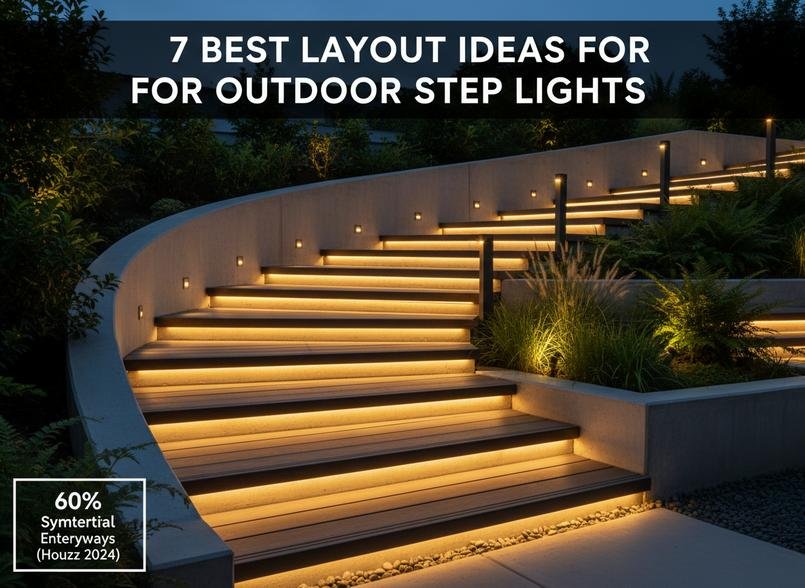
7 Best Layout Ideas for Outdoor Step Lights
Get inspired with layout ideas that blend style, safety, and smart design for your outdoor step lights.
Symmetrical vs. Asymmetrical Lighting Designs
Balance or break the rules? Here’s how each approach plays out in real life:
- Symmetry gives a clean, formal look—perfect for grand entrances or classic patios.
- Asymmetry adds personality, especially in modern gardens or irregular staircases.
- Use symmetry when your steps are evenly spaced and framed by architectural features.
- Go asymmetrical if you’re working with curved paths or want to highlight specific textures.
A study from Houzz Trends Report (2024) found that over 60% of homeowners prefer symmetrical lighting layouts near entryways, while asymmetrical designs are gaining traction in backyard seating zones for their artistic flair.
Layered Lighting: Combining Different Techniques
Mixing light types isn’t just about looks—it’s about creating depth and mood.
• Start with ambient lighting using soft wall-mounted fixtures.
• Add task lights directly into the steps to boost visibility.
• Accent with downlights from nearby trees or eaves to highlight texture and form.
Layering creates visual interest while enhancing safety—especially important when figuring out how to install outdoor step lights on uneven terrain or complex stair systems. Think of it like seasoning food: too little is bland; too much overwhelms.
Pathway Highlighting for Safety and Style
Pathway lighting does double duty—it keeps you safe while making your yard look sharp.
- Position low-voltage LEDs along the outer edge of each step.
- Space fixtures evenly but not rigidly—aim for natural visual flow.
- Choose warm color temperatures (2700K–3000K) to create inviting ambiance.
- Avoid glare by angling lights downward or using shielded fixtures.
| Fixture Type | Ideal Placement | Color Temp | Lifespan (hrs) |
|---|---|---|---|
| Step Light | Stair risers | 2700K | ~50,000 |
| Path Light | Walkway edges | 3000K | ~40,000 |
| Deck Light | Railings/posts | 2700K | ~45,000 |
Lighting pros often recommend this method when clients ask how to install outdoor step lights without cluttering their walkways with bulky hardware.
Anchoring Features: Steps and Focal Points
Let your lighting tell people where to look—and where not to trip!
▪ Highlight each stair tread’s edge with recessed LED strips or puck lights beneath overhangs.
▪ Use uplights at corners or landings to define space transitions clearly.
▪ Illuminate focal points like sculptures, benches, or unique materials near the stairs using narrow-beam spotlights.
This combo anchors both the physical structure of your layout and its emotional impact—drawing attention where it matters most while guiding safe movement through space.
Incorporating Natural Elements into Your Layout
Nature doesn’t follow straight lines—and neither should your lighting plan sometimes.
Short bursts:
- Tuck small fixtures behind tall grasses for hidden glows.
- Use rock crevices as natural housings for step lights.
- Let vines partially obscure path lights for a dreamy effect.
- Reflect light off water features nearby steps—it adds shimmer without extra energy cost.
Blending lighting into organic materials helps your setup feel less staged and more alive. When you’re exploring how to install outdoor step lights around garden paths or stone stairs, this technique makes everything feel intentional yet effortless—like nature planned it herself.
How to Position Your Step Lights for Maximum Visibility
Getting the hang of positioning step lights can make all the difference between tripping hazards and sleek nighttime ambiance. Here’s how to light it right.
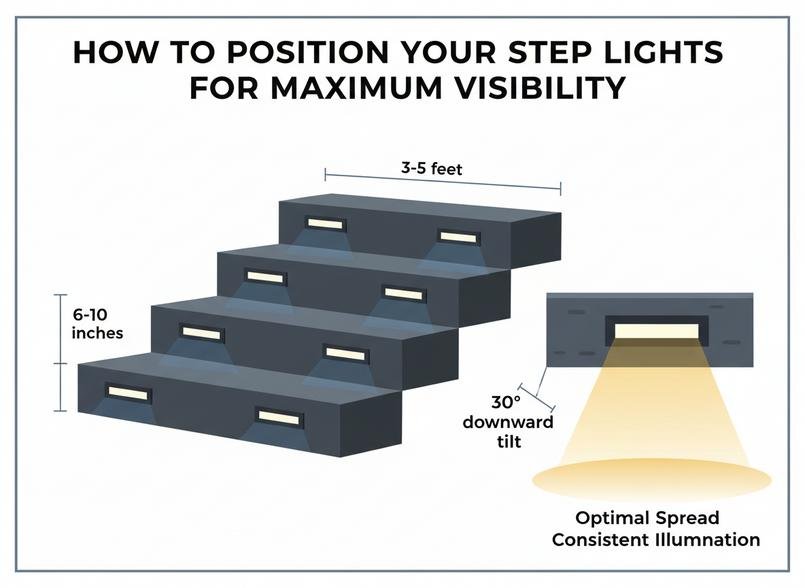
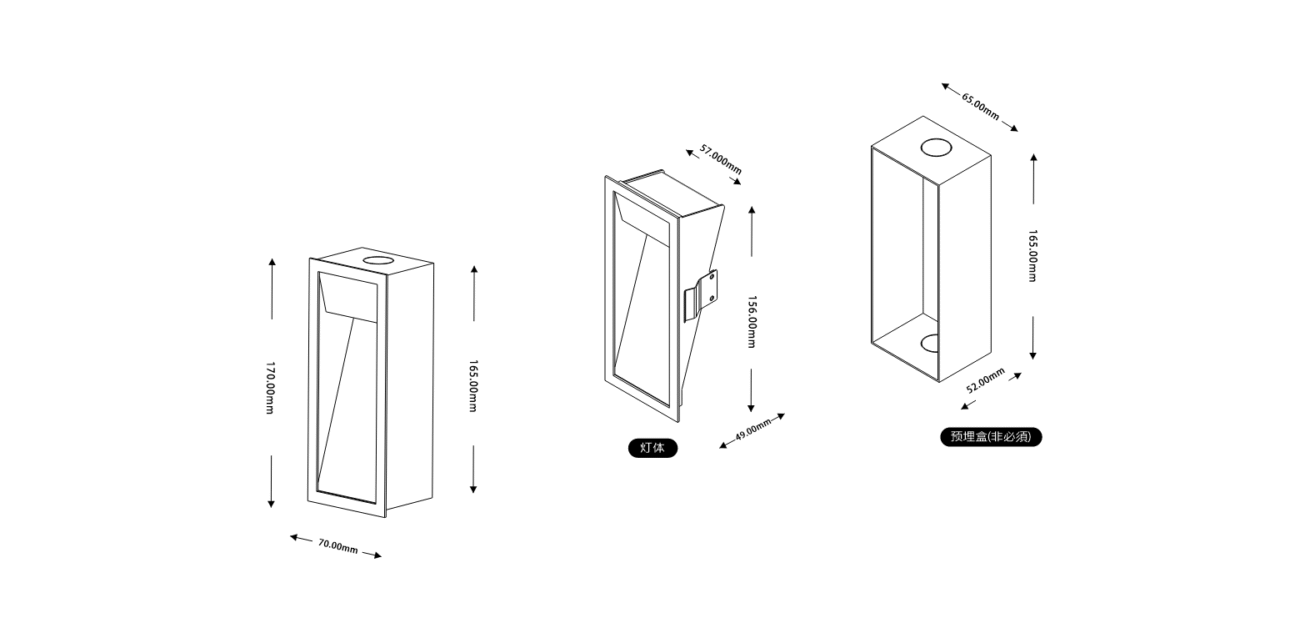
Ideal Height and Distance for Optimal Light Spread
- Mounting Height: Keep fixtures low—usually around 6–10 inches above each step. This keeps the beam close, reducing unwanted glare while improving visibility.
- Spacing Between Fixtures: Space lights evenly, roughly every 3–5 feet depending on your fixture’s lumens output. More powerful beams? Wider spacing works. Dimmer bulbs? Tighter spacing is key.
- Distance from Edge: Install lights about an inch back from the stair edge so the entire tread gets covered without spilling over.
- Coverage Zone Awareness: Know your light’s throw radius—some cover just one stair; others illuminate multiple treads with wide-angle spread.
- Consistency Matters: Uneven gaps kill symmetry and create dark spots. Uniformity ensures clean, safe lines of light throughout.
- Mg Lights’ compact LED models are designed specifically to maximize low-height coverage without flooding surrounding areas.
Short-tail variations used here include: install step lights, outdoor step lighting, best layout ideas
Common Placement Strategies for Different Settings
You’ve got options—and each space demands its own vibe when installing outdoor step lights:
• For residential stairs, tuck mini LEDs into vertical risers. It’s subtle but gives killer visibility on every tread without messing with your home’s exterior style.
• On decks or patios, embed strip-style lighting under railing lips or seat edges. This adds ambient glow while softly defining boundaries at night.
• Pathways need slightly taller bollard-style fixtures spaced along curves—this avoids harsh shadows and keeps things looking natural as you walk through.
• Commercial spaces like hotels or restaurants often go bold with recessed side-wall fixtures that double as design elements and safety enhancers.
Also worth noting? Outdoor step lighting isn’t one-size-fits-all—play around with combinations until it suits your setup.
Short-tail variations used here include: how to install outdoor lighting, deck light layout ideas
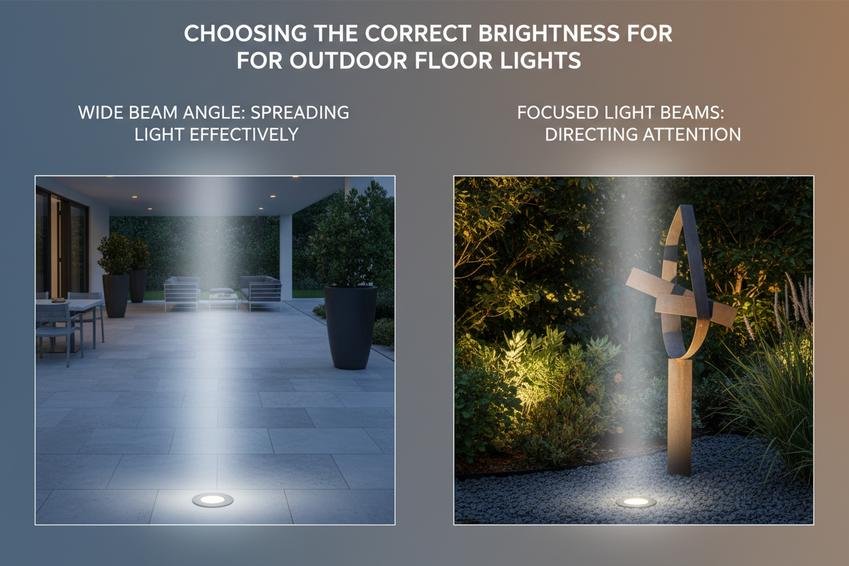
Using Angles to Enhance Light Distribution
- Tilt Downward Slightly: Aim beams downward at a gentle angle—around 30 degrees—to reduce direct eye contact with the bulb and eliminate harsh glare.
- Play With Beam Widths: Narrow-beam fixtures work well on tight stairs; wider beams are better on open platforms where more surface needs coverage.
- Avoid Flat Mounting Surfaces When Possible: Angled placement helps define texture in stone or wood steps by casting soft shadows that improve depth perception.
- Mind Your Shadows: If you’re seeing strange dark patches between steps, adjust direction slightly left or right until even distribution is achieved.
- A touch of experimentation goes a long way here—rotate each fixture before locking it in place during installation.
Short-tail variations used here include: outdoor step light angles, best way to install deck lights
Mg Lights offers adjustable-angle housings perfect for tailoring beam direction based on your setup’s quirks.
Best Practices for Maintaining Outdoor Step Lights
Keeping your outdoor step lights looking sharp and working right doesn’t take much—just some regular upkeep and a bit of know-how.
Regular Cleaning Methods to Prolong Lifespan
• Wipe the lens gently with a soft cloth dipped in water mixed with mild soap. Skip anything abrasive—your lights aren’t fans of harsh chemicals.
• Use a soft brush to loosen up any stuck-on dirt or debris, especially around the base and housing.
• Check for signs of corrosion, particularly on metal fixtures, and apply protective sealant if needed to keep moisture out.
The trick is consistency—give them a quick clean every couple weeks during high-use seasons, and they’ll stay bright without breaking down.
Troubleshooting Common Issues with Step Lights
Power acting weird? Here’s what to check before calling it quits:
- Confirm your power source is solid—test the outlet or transformer.
- Inspect all visible wires for damage or wear; exposed wiring can short things out.
- Tighten up any loose connections, especially where fixtures meet cables.
- Replace old bulbs showing signs of dimming or flickering—the issue might just be simple bulb replacement.
- Look for signs of moisture inside the fixture that could indicate water ingress.
According to recent findings by Energy Trends Review (2024), over 40% of outdoor lighting failures are caused by minor issues like poor seals or tripped circuit breakers, not full system malfunctions.
By staying ahead of small hiccups, you’ll avoid big headaches—and keep your lights shining safely along every step outside your home.
FAQs about How to Install Outdoor Step Lights + 7 Best Layout Ideas
What essential tools help make installation smoother and safer?
A well-prepared toolkit feels like a trusted companion during the job. Keep these close:
- A sturdy Phillips and flathead screwdriver for precise assembly
- Power drill with masonry bit when stone or concrete stands in your way
- Wire stripper to expose clean copper ends without fraying
- Voltage tester—your silent guardian before touching live wires
- Weather-resistant screws that won’t surrender to rain or frost
How can I keep outdoor step lights glowing beautifully over time?
Treat them as part of your home’s heartbeat: wipe away dust with a soft damp cloth, check lenses for cracks, replace tired bulbs promptly, and ensure wiring remains snug against shifting seasons. Small acts keep their light steady through years of footsteps.
Why do LED fixtures feel like the wiser choice for large projects?
LEDs sip electricity instead of gulping it, casting bright yet gentle beams while lasting far beyond traditional bulbs. In bulk orders, this means fewer replacements, lower bills, and an enduring glow across every stairway you illuminate.
Which layout blends lighting naturally with plants or stone features?
Think harmony rather than dominance: place low-profile fixtures near shrubs so leaves dance in the light; guide paths around boulders where shadows add depth; let symmetry echo nature’s rhythm so each step feels part of its surroundings.
What common errors could dim both beauty and safety during installation?
Loose wiring invites sudden darkness; placing lights too high blinds rather than guides; crowding circuits risks tripping breakers mid-evening. Avoid haste—measure twice, connect firmly, space thoughtfully—and every stair will shine as intended.
Can layered lighting truly transform wide public steps into inviting spaces?
Yes—uplights trace architectural lines from below while downlights soften tread edges; path illumination leads visitors gently forward. Together they create zones where movement feels guided yet free under a warm night sky.