Cutting into tile or hardwood for a Recessed Floor Light Installation isn’t just another Tuesday on the job—it’s a tightrope walk between craftsmanship and chaos. One wrong move with the saw, and you’re staring at cracked porcelain or splintered oak that’ll make your client’s blood pressure spike. Precision’s not optional here; it’s survival.
Back in ’09, I watched a crew spend hours patching up jagged tile cuts simply because no one bothered to use a proper diamond bit. That extra $12 tool could’ve saved them three hours and two cups of coffee gone cold. Sometimes, it’s the little things that keep big projects from going sideways.
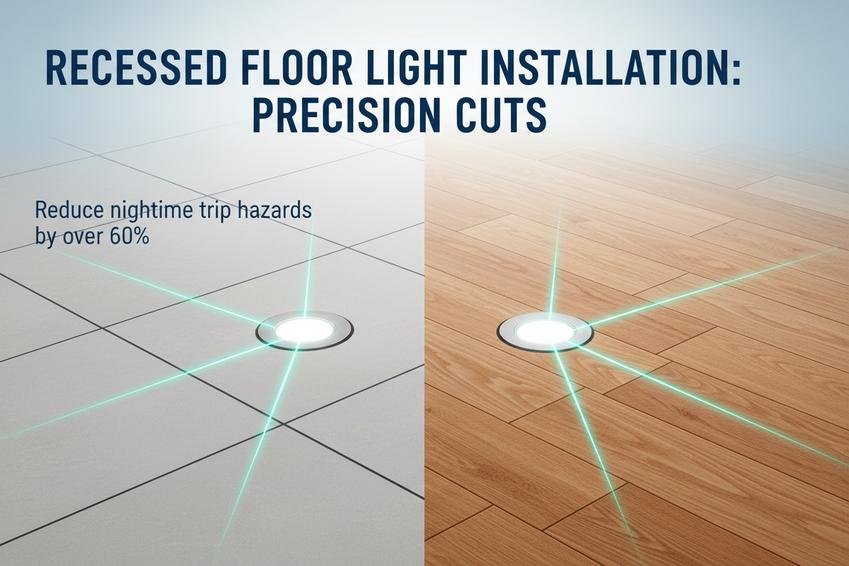
“Lighting is as much about safety as aesthetics,” says Angela Moss, lead lighting designer at LumenPro Group. According to their 2023 commercial lighting report, step and floor illumination reduce nighttime trip hazards by over 60% in high-traffic spaces.
This guide walks you through cutting cleanly—no ragged edges, no stress—so every recessed light sits flush like it was born there.
Quick Insights for Recessed Floor Light Installation
- Lighting Impact: Proper lighting significantly enhances ambiance and safety in any space, reducing nighttime trip hazards by over 60%.
- Location Strategy: Effective placement involves assessing ceiling height, space dimensions, and intended functionality for optimal light distribution.
- Cutting Techniques: Precision is crucial when cutting tile or hardwood; using the right tools can prevent damage and save time during installation.
- Common Pitfalls: Ensure electrical wiring connections are secure, select appropriate junction box sizes, and confirm UL safety compliance to avoid installation issues.
- LED Benefits: Energy-efficient LED lights not only provide low-glare illumination but also have a long lifespan that contributes to overall cost savings.
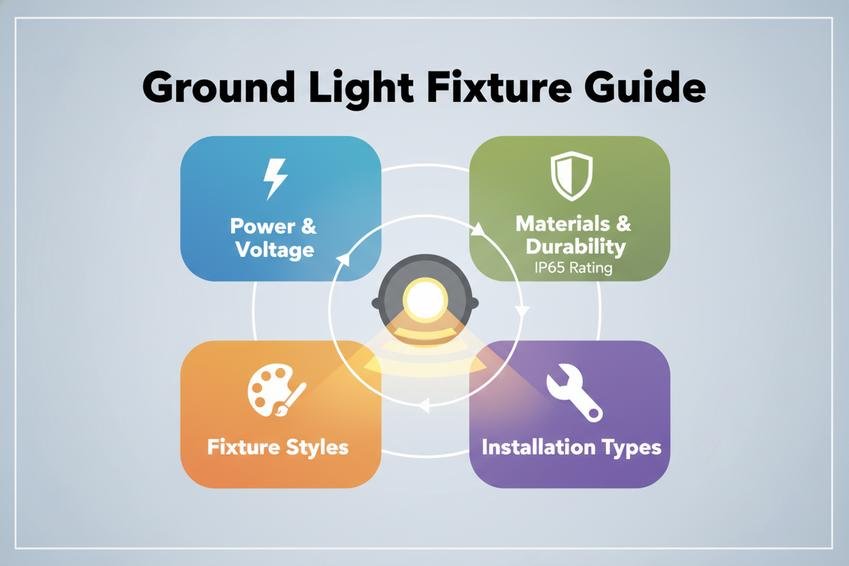
- Safety Standards: Always choose fixtures with IP65 waterproof ratings for outdoor installations and make sure to use secure mounting hardware for stability.
Why Recessed Floor Light Installation Matters for Your Space
Installing recessed floor lights isn’t just about brightness—it’s about transforming how your space feels, functions, and saves you money.
The Impact of Lighting on Ambiance
Lighting doesn’t just illuminate—it sets the whole vibe. That soft glow from a well-placed recessed light? It can shift an entire room’s ambiance from sterile to soothing in seconds.
- Mood shifts with tone: Warm-toned lighting promotes relaxation, while cool tones energize and focus.
- Positioning matters: Low-angle lighting design enhances textures and creates depth, adding subtle drama.
- Layering light sources: Combine overhead, task, and floor-level lighting to create dynamic atmosphere zones.
“In a recent post-pandemic home design report by Houzz (2024), over 67% of homeowners said lighting was their top tool for creating emotional comfort at home.”
A strategically installed recessed floor light installation amplifies architectural features without clutter. It’s not just about seeing better—it’s about feeling better in your own space. Whether it’s highlighting textured walls or softly outlining stair edges, smart lighting transforms perception—and that changes everything.
Elevating Aesthetics and Functionality with Recessed Lighting
When done right, recessed floor lights are like the unsung heroes of interior design—subtle yet powerful.
• Aesthetics
- Seamless integration into flooring keeps sightlines clean.
- Minimalist profiles enhance modern interiors.
- Highlights materials like stone, hardwood, or polished concrete.
• Functionality
- Excellent for low-profile spaces where traditional fixtures won’t fit.
- Acts as both task lighting along hallways or kitchen toe-kicks and as gentle night guidance.
- Reduces glare by staying flush with surfaces—ideal for workspaces or reading nooks.
• Dual-purpose brilliance
- Adds visual interest while boosting safety.
- Perfect for accentuating steps or transitions between rooms.
This type of embedded setup doesn’t scream “look at me,” but instead whispers sophistication. Every corner gets its moment without taking up real estate—because good design is equal parts form and function. With smart placement during your recessed floor light installation process, you get both beauty and brains in one flick of the switch.
Energy Efficiency: A Smart Choice for Long-Term Savings
Recessed lighting isn’t just sleek—it can be seriously smart when it comes to cutting down long-term energy use. Here’s how:
Step 1 – Choose LED-based fixtures
Switching to LEDs cuts power consumption by up to 80%. These bulbs last longer too—sometimes over ten years before needing replacement.
Step 2 – Install dimmable systems
Dimming not only adjusts mood but also reduces wattage draw instantly. Pair this with motion sensors in low-use areas like hallways or basements? You’re golden.
Step 3 – Use zoning controls
Instead of powering every light at once, break your space into zones controlled independently. That way you’re only using what you need—when you need it.
| Fixture Type | Avg Wattage | Lifespan (hrs) | Annual Cost ($) |
|---|---|---|---|
| Incandescent | 60W | ~1,200 | $85 |
| CFL | 14W | ~8,000 | $25 |
| LED (Dimmable) | 10W | ~25,000 | $12 |
| Smart LED + Sensor | <10W | ~30,000+ | $9 |
With rising electricity rates across North America in early Q2 of 2024 (U.S. EIA), upgrading through thoughtful recessed floor light installation isn’t just stylish—it’s strategic. You’re reducing your carbon footprint while saving hundreds annually on bills. Win-win? Absolutely.
Choosing the Right Location for Recessed Lights
Getting the recessed floor light installation just right starts with picking the best spots for your lights—indoors or out.

Key Factors for Effective Light Placement
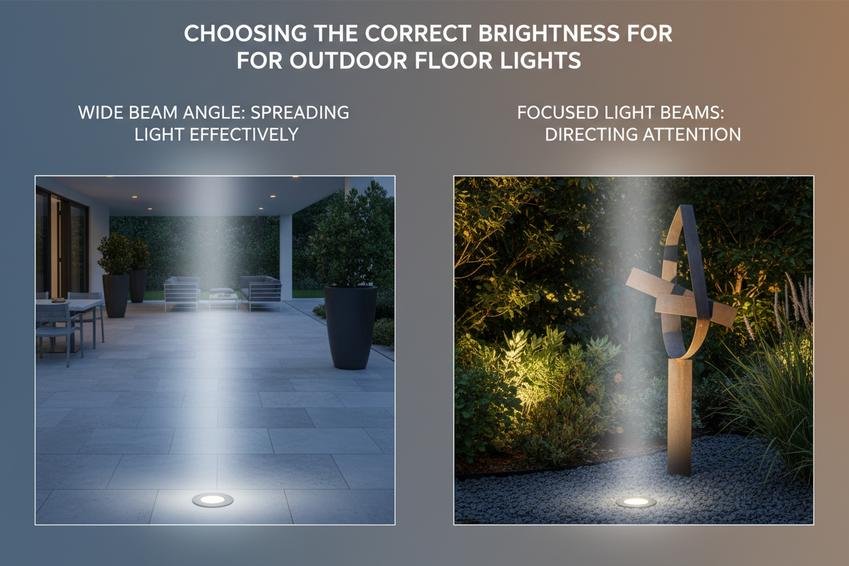
- Ceiling height makes a huge difference; taller ceilings need wider beam angle fixtures.
- Consider how the space is used—task lighting for kitchens, ambient for lounges.
- Stick with consistent fixture spacing, roughly half the ceiling height between each can.
- Don’t ignore wall proximity; too close and you’ll get harsh shadows.
- Choose warm vs cool tones depending on room function and mood.
The way you place your lights isn’t just about brightness—it’s about crafting an experience.
Best Practices for Stairway Illumination Projects
Lighting stairs isn’t just about looks—it’s about safety, too.
- Use low-profile recessed fixtures directly above treads or along side walls.
- Prioritize even step illumination, avoiding hotspots or dark patches.
- Keep glare out of sight lines by angling lights slightly downward.
- Try a subtle wall wash technique if aesthetics matter as much as function.
- Always test at night before finalizing placement—it’s surprising what shadows pop up.
These little tweaks make all the difference when it comes to stair safety and style.
Optimizing Landscape Lighting Installations for Maximum Effect
Let your yard shine after dark by mixing form with function:

• Use directional accent lighting on trees, sculptures, or textured surfaces like stone walls.
• Layer multiple types: combine soft path lighting, wide-angle floodlights, and focused uplights.
• Go waterproof—always choose IP65+ rated fixtures for outdoor use in wet areas.
• Think security too—motion-triggered security lighting near entrances adds peace of mind without ruining the vibe.
By treating your garden like a canvas, your recessed floor light installation becomes more than utility—it becomes art.
Assessing Space Dimensions and Light Distribution
Proper layout starts with understanding your space—and yes, numbers matter here.
| Room Type | Suggested Lumen Output | Beam Spread Angle | Fixture Count per 100 sq ft |
|---|---|---|---|
| Living Room | 1500–3000 lumens | 60°–90° | 4–6 |
| Kitchen | 3000–4000 lumens | 40°–60° | 6–8 |
| Hallway | ~1200 lumens | Wide (~90°) | 2–4 |
| Bathroom | ~2000 lumens | Medium (~60°) | 4 |
Always adjust based on ceiling height and desired mood—you’re not locked into these numbers but they’re a solid starting point when planning any recessed floor light installation project.
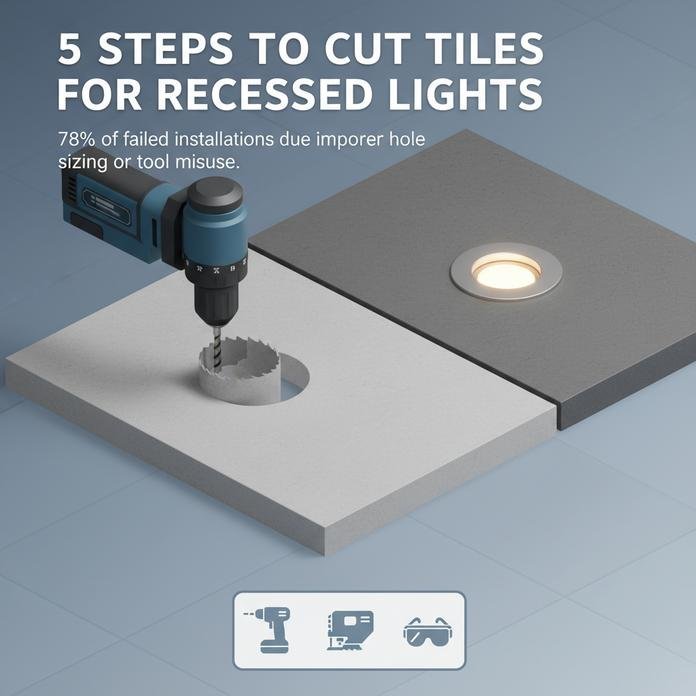
5 Steps to Cut Tiles for Recessed Lights
Cutting tiles cleanly for recessed lighting doesn’t have to be a pain. Let’s break it down so your tile job looks pro-level from the start.
Essential Tools for Precision Cutting
To get that perfect recessed floor light installation, you’ll need more than just elbow grease. Here’s your toolkit:
Cutting & Drilling Essentials
- Diamond hole saw – For smooth circular cuts that won’t chip your tile edges.
- Drill – Preferably variable-speed, to pair with your hole saw or core bit.
- Jigsaw – With a ceramic blade if you’re dealing with tricky angles or odd shapes.
Measuring & Marking Must-Haves
- Recessed light template – Speeds up layout and keeps cuts consistent across tiles.
- Measuring tape – Accuracy here means fewer wasted tiles later.
Finishing & Safety Gear
- Tile nippers – To fine-tune edges around tight corners or irregular openings.
- Safety glasses – Non-negotiable when shards fly during cutting.
According to the Tile Council of North America’s 2024 update, over 78% of failed tile installations involving recessed lighting were due to improper hole sizing or tool misuse—don’t skimp on quality gear.
Pro Tips for a Clean and Safe Cut
Want clean cuts without cracking tiles? Follow these real-world tips when installing recessed floor lights:
• Always start by double-checking your template placement with an accurate measurement, especially if you’re working with patterned tile layouts.
• Use masking tape over the cut line before drilling pilot holes—it helps prevent surface cracks and slipping bits.
• If you’re dry-cutting, control airborne debris using a shop vac attachment; better yet, go for a wet cutting setup when possible—it cools the blade and reduces dust fast.
• Choose the right blade: porcelain needs a continuous rim diamond blade; softer ceramics can handle segmented ones—this is where proper blade selection matters most.
• Work slow and steady—rushing leads to chipped edges or worse, shattered tiles. Keep your speed low and let the tool do its thing (slow cutting speed) is key here.
And don’t forget safety: gloves on, goggles up. No one wants to spend Saturday night in urgent care because they skipped basic safety precautions while doing their DIY install.
By following these tips—and using trusted brands like Mg Lights—you’ll turn any recessed lighting project into something worth showing off at dinner parties.
Common Mistakes During Recessed Light Installation
Even seasoned DIYers mess up recessed floor light installation. Here’s how to dodge the usual blunders and keep your lighting project smooth and safe.
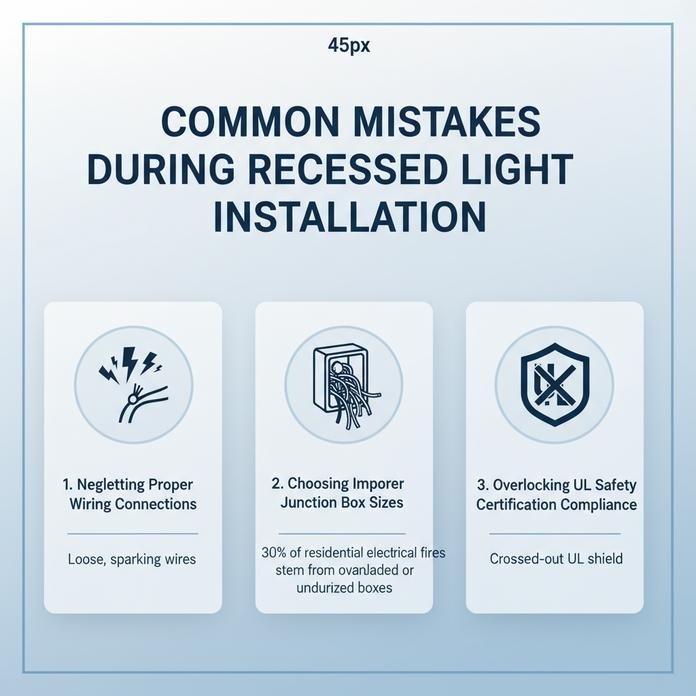
Neglecting Proper Electrical Wiring Connections
• Loose electrical wiring can lead to flickering lights or, worse, short circuits.
• Always double-check that wire nuts are tightly secured—no exposed copper should peek out.
• Use UL-listed connectors only; don’t trust cheap knockoffs.
- Strip wires cleanly—frayed ends are a no-go.
- Match color codes properly (black to black, white to white).
- Test the circuit with a voltage tester before powering on.
→ A single weak connection can create heat buildup over time, risking fire or failure.
If you’re installing recessed lights into hardwood or tile floors, the last thing you want is an electrical gremlin hiding underfoot. Proper grounding, full insulation, and adherence to local electrical code make all the difference between a flawless install and a call to the fire department.
Choosing Improper Junction Box Sizes
• Using a too-small junction box? That’s asking for overheating issues down the line.
• Know your wire count—each conductor takes up space under NEC’s box fill rules.
Grouped by concern:
– Size: Choose boxes rated for at least 18 cubic inches for basic installs with multiple conductors.
– Volume: Add extra room if you’re connecting dimmers or smart controls later on.
– Compatibility: Match your box size with fixture depth and ceiling/floor cavity space.
When installing recessed floor light fixtures, it’s not just about making things fit—it’s about making them safe long-term.
“According to NFPA’s 2024 Electrical Safety Report, over 30% of residential electrical fires stem from overloaded or undersized boxes.” That stat alone should give anyone pause before cramming wires into an undersized housing unit.
Overlooking UL Safety Certification Compliance
☐ Skipping out on checking for UL certification? That’s flirting with disaster—and possibly voiding insurance coverage too.
⤷ Look for “UL Listed” clearly marked on any product packaging or stamped directly onto metal components of your recessed floor light kit.
Short notes:
— UL ensures products meet national safety standards, especially for high-risk installs like in-floor lighting where moisture and foot traffic are factors.
— Avoid off-brand imports without proper testing—they may lack essential fire-retardant coatings or shock protection layers.
Lights installed beneath flooring take more abuse than ceiling fixtures ever will—from spills to furniture scrapes—which makes proper compliance non-negotiable if you want peace of mind (and code approval).
Whether you’re retrofitting older homes or outfitting new builds, Mg Lights offers certified products that simplify recessed floor light installation without compromising safety or style.
Advantages of LED Recessed Floor Lights
LED recessed floor lights aren’t just about sleek looks—they’re packed with smart advantages. From saving energy to reducing glare, they’re built for better living.

Energy-Efficient LED Technology: Benefits Explored
- Lower power consumption means your electricity bill doesn’t spike even with hours of use.
- High lumens per watt ensures bright output without draining energy.
- Sustainability is baked in—less waste and fewer emissions over time.
- Switching from halogen to LED can cut lighting energy use by up to 75%.
- Thanks to their efficiency, LEDs reduce heat output—great for tight spaces like floor recesses.
- Less heat also means less strain on your cooling systems.
• You get more light for every watt you spend—literally. That’s what makes these lights shine in both eco-friendliness and cost savings.
LEDs used in recessed floor light installation offer a winning combo: high brightness, low power consumption, and serious energy efficiency. Whether you’re lighting up a hallway or accenting stair treads, you’re doing it without guilt or waste.
Long Lifespan Light Sources: A Cost-Effective Solution
• Average lifespan? Over 25,000 hours—and some models go beyond 50,000. • That’s years of use before you even think about replacing them. • No flickering as they age; just steady performance all the way through.
Shorter-lived bulbs might save cash upfront but cost more in the long run with frequent replacements. With an LED recessed floor light installation setup, you’re investing in longevity, not just illumination.
A good set of LEDs brings unmatched durability, requiring far less maintenance than traditional options. Add that to lower replacement costs, and it’s clear why they’re favored for both homes and commercial spaces alike. One install can last through multiple home makeovers!
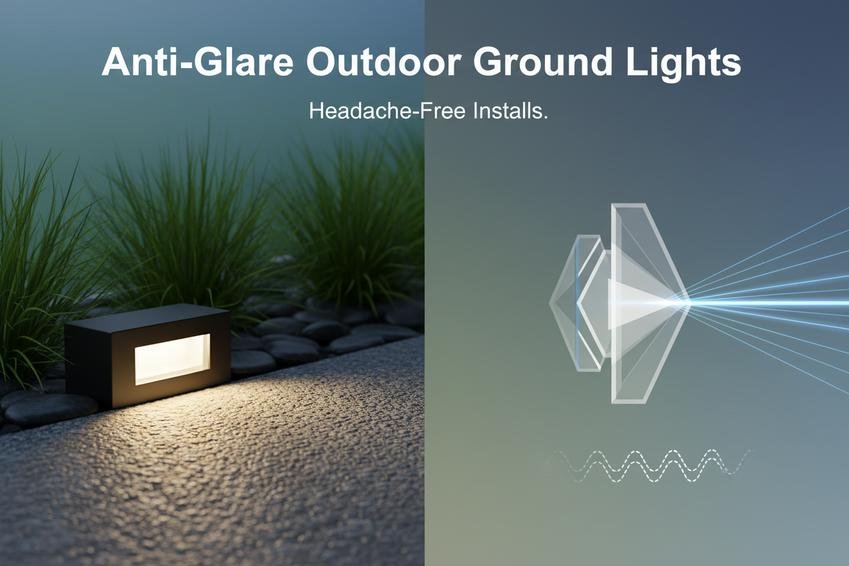
Low-Glare Light Distribution for Comfort
• Soft beams mean no harsh reflections bouncing off polished floors. • Wide beam angles create even pools of light across walkways. • Thoughtful light distribution helps prevent eye fatigue during nighttime strolls indoors.
- The secret sauce? Built-in diffusers that minimize direct glare.
- Smart positioning during recessed floor light installation enhances comfort without sacrificing visibility.
- It’s not just about brightness—it’s about how that brightness feels on your eyes.
Low-glare lighting isn’t just a luxury—it’s essential if you want cozy vibes without straining your vision every time you walk through the room at night. These fixtures are engineered for maximum visual comfort, making them perfect for bedrooms, hallways, or anywhere mood matters more than dazzle.
By combining thoughtful design with advanced optics and strategic placement, LED recessed fixtures deliver functional yet gentle illumination—exactly what modern interiors call for today.
Safety Measures for Recessed Light Installation
When it comes to safe and stylish recessed floor light installation, cutting corners isn’t an option. Here’s how to keep things waterproof, stable, and worry-free.
Importance of IP65 Waterproof Rating Standard
Keeping your recessed fixtures protected against the elements is more than just smart—it’s essential:
- ✔️ An IP65 rating means the fixture is sealed tight against dust and can handle jets of water from any direction—perfect for patios, walkways, or damp indoor zones like bathrooms.
- 💧 Moisture-prone areas such as pool decks or garden paths practically demand this level of protection.
- 🛁 In bathrooms, these lights shrug off splashes with ease, ensuring long-term safety where humidity runs high.
Now here’s something worth noting: According to a 2024 report by Lighting Research Center, over 62% of outdoor lighting failures stem from insufficient moisture protection. That’s a stat you don’t want to ignore if you’re aiming for durability.
So whether you’re mounting lights near the shower or installing them along your backyard path, choosing models with solid moisture resistance and certified waterproof standard credentials isn’t just a good idea—it’s non-negotiable.
Ensuring Secure Mounting Hardware is Included
Don’t let your entire floor light installation wobble because someone forgot the screws—or worse, used the wrong ones:
• Includes essential components like:
- Heavy-duty mounting hardware
- Spring-loaded retention clips
- Precision-fit brackets for snug ceiling fit
• Each piece plays a role in:
- Ensuring rock-solid anchoring into drywall or concrete
- Supporting consistent fixture alignment
- Preventing sagging or detachment over time
• For optimal results:
- Always check if the package includes all necessary installation components
- Avoid mixing third-party parts unless they meet local electrical codes
- Use only fixtures that pass strict safety standards
With Mg Lights’ kits, you get everything out of the box—no last-minute trips to the hardware store. It makes your recessed setup smoother and safer from start to finish.
Getting every detail right on your recessed floor light installation means fewer headaches later—and way more glow where it counts.
FAQs about Recessed Floor Light Installation
How does recessed floor light installation improve stairway illumination projects?
A well-placed light can turn steps into safe, welcoming paths. On commercial building staircases or quiet residential outdoor pathways:
- Warm white color temperature keeps the glow soft yet clear.
- Low-glare light distribution guides feet without blinding eyes.
- Corrosion-resistant stainless steel housing withstands daily wear in high traffic.
Which materials matter most for long-lasting garden step applications?
Durability begins with the body and lens: weather-resistant aluminum housing resists rain; impact-resistant polycarbonate lens defies cracks; UV-protected surface coatings ensure colors stay true under summer sun.
Why is IP65 waterproof rating standard critical for landscape lighting installations?
Rainstorms, sprinklers—nothing should dim your lights:
- Waterproof sealed construction shelters wires from moisture intrusions.
- Flush-mount designs prevent pooling water at fixtures’ edges.
- Reliable operation even when garden paths are dripping after a downpour.
What supplier capabilities support large bulk orders for commercial building staircases?
Strong partnerships save headaches: bulk order fulfillment capacity keeps projects on schedule; custom product design options give freedom to match junction box sizes perfectly; responsive technical support team resolves snags before they slow you down.
How do energy-efficient LED models reduce maintenance costs overall?
Long lifespan light sources mean fewer replacements—which means less time up ladders and lower labor cost—while consistent light output levels hold steady, turning an initial investment into years of dependable brightness and power savings that echo through utility bills month after month.