Bad installs turn driveway lights on ground into a blackout fiasco—plan smart, avoid flickers, and keep your curb game strong.
Installing driveway lights on ground might seem easy—until it’s not. One wrong move and you’ve got flickering fixtures, puddles where bulbs used to be, or worse: a total blackout when your cousin pulls into the driveway at night. Been there, fried that. Lighting isn’t just utility—it’s safety with style, curb appeal with function. Yet too many project managers treat lighting like an afterthought… until the repairs start stacking up.
Truth is, most large-scale buyers don’t trip over budget—they stumble on bad planning and poor placement. According to a 2023 survey by Electrical Contractor Magazine, nearly 47% of outdoor lighting failures stem from incorrect installation choices made during the early phases of a project. That’s not just wasted dollars—it’s time lost on callbacks no one wants to make twice.

Key Points in the Glow: What to Know Before Installing Driveway Lights on Ground
→ Proper Light Spacing: Avoid dim patches and ensure even brightness by calculating placement carefully—especially with LED driveway lights.
→ Power Source Planning: Match your lighting setup with compatible power sources like low voltage transformers to prevent overload or flickering.
→ Weatherproofing Materials: Choose durable components like weatherproof aluminum alloy and sealed construction for long-term performance outdoors.
→ Local Code Compliance: Check local regulations for outdoor lighting to avoid fines and ensure a safe, legal installation process.
→ Optimal Fixture Placement: Position lights away from obstructions and near key visibility points for both safety and curb appeal.
→ Ambient Light Balance: Use dusk-to-dawn sensors and appropriate color temperature to harmonize new lighting with existing ambient conditions.
Common Mistakes With Driveway Lights On Ground Installation
It’s easy to mess up a good lighting plan. Here’s where most folks go wrong with driveway lights on ground, and how to avoid those pitfalls.
Miscalculating Light Spacing: The Importance of Proper Placement
Getting the spacing right isn’t just about looks—it’s about keeping your driveway safe and evenly lit from end to end.
- Light spacing should never exceed 8–10 feet for optimal visibility.
- Place driveway lights closer at curves or entry points for better guidance.
- Avoid placing lights directly across from each other—alternate sides for a natural rhythm.
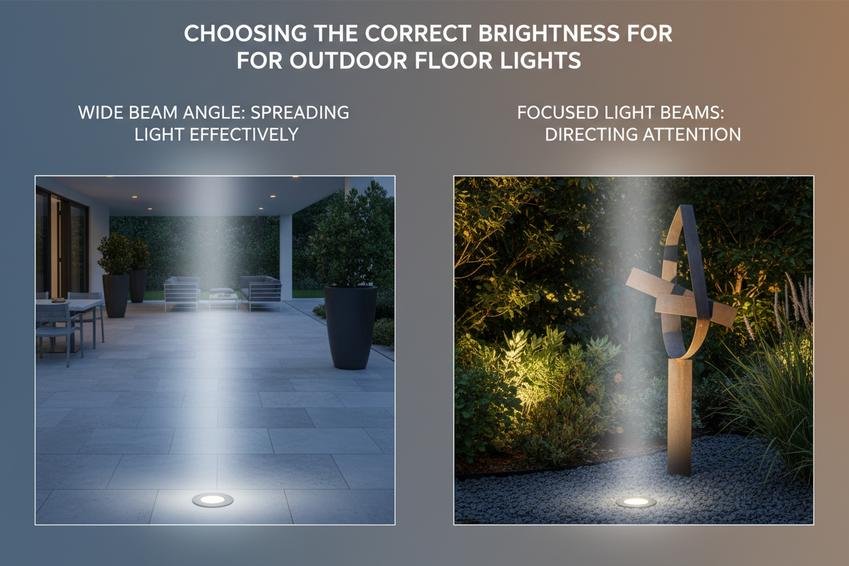
- Consider beam spread; wider beams need fewer fixtures, narrow beams need more.
- Use mockups before final install to test real-world light coverage.
- Uneven placement can lead to dark patches, which are both unsafe and unattractive.
- For long driveways, staggered layouts help maintain consistent illumination without overloading the visual field.
Underestimating Power Needs: Choosing the Right Power Supply
Power misjudgments can fry your system or leave you in the dark—literally.
• Start by calculating total wattage across all fixtures. Add a 20% buffer for future upgrades or load surges.
• Choose a transformer that matches your voltage system—12V is common for landscape setups.
• Check each light’s energy draw against your power source’s output capacity. Don’t just guess—read those specs!
• Don’t mix LED and halogen unless you’re using separate circuits—they have different load profiles.
• If running long cables, factor in voltage drop; you might need heavier gauge wire or multiple power feeds.
MG Lighting offers modular systems that simplify this process while keeping things efficient and scalable.
Overlooking Weatherproofing: Selecting Materials for Durability
Forget about pretty if it doesn’t last through rain, snow, or summer scorchers.
Step 1: Choose fixtures made from corrosion-resistant materials like stainless steel or weatherproof aluminum alloy.
Step 2: Confirm an IP65 rating or higher to ensure solid protection against water ingress and dust buildup.
Step 3: Use waterproof connectors and silicone sealants at all junction points—even underground ones matter here!
Step 4: Elevate low-profile ground lights slightly above grade level to avoid pooling water damage over time.
Skipping these steps will cost you more in replacements than investing right the first time.
Ignoring Local Regulations: Compliance for Driveway Lighting
Rules vary wildly by city—and ignoring them could mean fines or forced removals.
Some areas require permits before installing any exterior electrical work like driveway lighting systems. Others enforce strict brightness caps based on zoning laws to prevent light pollution near residential zones.
You might also run into homeowner association guidelines dictating fixture style, color temperature, or even installation height limits.
According to NAHB’s April 2024 compliance study, “over 37% of outdoor lighting violations stem from improper fixture placement within setback lines.”
Always check local ordinances before buying anything—or better yet, consult a licensed installer who knows what flies in your area.
Ignoring these rules? That’s not just risky—it could be illegal depending on where you live.
Choosing The Wrong Location For Driveway Lights On Ground

Picking the wrong spot to place your driveway lights on ground can mess with both safety and curb appeal. Here’s how to get it right.
Ideal Spots for LED Driveway Lights: Maximizing Visibility
- Place LED driveway lights along the outer driveway edges, especially where curves or turns reduce visibility.
- Add fixtures near the entrance and any intersecting pathways to eliminate blind spots.
- Use low-profile models that emit light outward instead of upward—this keeps glare down but still lights up the way.
- Avoid clustering too many in one area; spacing them evenly helps maintain consistent illumination across surfaces.
- MG Lighting’s ground-mounted LEDs are a solid pick—they’re sleek, bright, and built to last through all kinds of weather.
According to a May 2024 report by Outdoor Lighting Market Insights, “Strategically spaced ground-level LEDs can increase nighttime driveway safety ratings by up to 43%.”
Avoiding Obstructions: Pathway Lighting Fixture Placement Essentials
Grouped into three essential categories:
A. Physical Barriers
• Don’t tuck lights behind bushes or low-hanging branches—plant growth can block light beams.
• Keep them away from garden decor or lawn furniture that might shift into their path.
B. Movement Zones
• Stay clear of areas with heavy pedestrian traffic, like stepping stones or walkways branching off the main drive.
• Leave enough clearance so vehicle tires don’t brush against fixtures during tight turns or parking maneuvers.
C. Long-Term Hazards
• Watch out for sprinkler heads that could corrode electrical parts over time.
• Account for seasonal snow piles if you live in colder climates—they’ll bury your lights half the year.
By avoiding these pitfalls, your pathway lighting won’t just look clean—it’ll stay functional year-round without posing any hidden safety hazards.
Assessing Landscape Features: Enhancing Aesthetics and Functionality
This one’s all about balance between form and function:
- Map out existing landscape features, like trees, flower beds, and decorative rocks.
- Use those elements as natural framing points—placing a light beside a tree trunk or near a curved garden edge adds depth.
- Match fixture finishes with your home’s overall vibe; bronze tones work well with rustic themes while stainless steel pops on modern exteriors.
- If you’ve got elevation changes—like steps or sloped drives—anchor a few downward-facing units at each level change.
| Landscape Element | Suggested Light Type | Aesthetic Impact | Functional Value |
|---|---|---|---|
| Garden Bed Edges | Low-glow LED stakes | Soft ambient glow | Border definition |
| Tree Bases | Uplights | Dramatic shadows | Vertical guidance |
| Sloped Areas | Recessed step lights | Sleek integration | Trip prevention |
Thoughtfully placed driveway lights on ground, when synced with your yard’s natural flow, turn basic illumination into an artful outdoor experience that works as good as it looks.
Neglecting Ambient Light Considerations: A Common Pitfall
Skipping the ambient light factor? That’s where most people mess up their outdoor lighting game.
How Dusk-to-Dawn Sensors Impact Light Performance
- Dusk-to-dawn sensors kick in automatically when natural light dips, keeping your yard lit without any manual hassle.
- They save power by reducing unnecessary energy consumption, only turning on when it’s actually dark.
- Smart placement of these sensors ensures they don’t misread shadows or artificial light as nightfall.
- A sensor mounted too close to another light source can delay its activation time, making your driveway dimmer than expected.
- Poorly calibrated light sensitivity settings cause flickering or premature shutdowns—annoying and unsafe for navigating around driveway lights on ground setups.
- Using advanced photocell technology, modern sensors adapt better to seasonal changes in daylight hours.
☑️ Pro tip: Place your dusk-to-dawn sensor away from reflective surfaces like windows or white walls to avoid false readings.
When you’re relying on low-profile lighting like those subtle little driveway lights on ground, you want them to be consistent—not glitchy because of a badly installed sensor. Think about how often you’ve walked outside at dusk only to squint through patchy lighting because someone forgot this basic step.
Short bursts of bright light might look cool, but without the right tech managing them, they’re just wasted watts. And no one wants a half-lit driveway that looks like a horror movie set.
The Role of Color Temperature in Balancing Ambient Light
- Warm tones like 2700K–3000K blend better with sunset hues and cozy exteriors.
- Cool whites (5000K+) amp up visibility but can clash with natural tones if overdone.
- Mid-range options around 4000K strike a balance between clarity and comfort—ideal for modern homes with varied textures and finishes.
- Determine existing ambient sources—porch lights, street lamps, even nearby windows all affect how your new setup will feel visually.
- Choose a color temperature that complements these surroundings rather than competing with them.
- Test different bulbs before committing; what looks great in-store might feel sterile outdoors under real conditions.
Grouping by use case:
• For soft pathways and garden borders → go warm white
• For security-focused spots near garages → lean toward cool white
• For transitional areas like steps or mixed-use patios → neutral tones work best
Your eyes don’t lie—if something feels off about your outdoor vibe, chances are the color temp is clashing with the scene. Especially when dealing with low-mounted setups like driveway lights on ground, mismatched color temps can make even well-planned layouts look chaotic or uneven.
By syncing color temperature with surrounding elements, you create visual harmony that feels intentional—and way more inviting after dark.
How To Ensure Safe Installation Of Driveway Lights On Ground

Installing driveway lights on ground isn’t just about looks—it’s about safety, durability, and smart power choices. Here’s how to do it right.
Understanding Electrical Sources: Direct Wiring vs. Low Voltage Options
Choosing between direct wiring and low voltage setups depends on your layout, safety needs, and budget. Both have their perks—but they also come with trade-offs.
- Direct Wiring Pros
- Stronger power output—great for large properties
- Fewer transformers needed
- Can handle longer runs without noticeable voltage drop
- Direct Wiring Cons
- Must follow strict local wiring codes
- Higher risk if improperly installed
- Requires licensed electrician for most installations
- Low Voltage Advantages
- Safer around pets and kids
- Easier DIY setup with plug-in transformers
- Lower energy use over time
- Low Voltage Drawbacks
- May need more frequent maintenance
- Susceptible to dimming over long distances without proper planning
Mixing both systems? Totally doable—just make sure you isolate circuits properly and use compatible components when laying out your ground-level lighting plan.
Safety First: Using UL Safety Listed Products
When dealing with outdoor electricity near moisture or soil, only go with gear that’s earned a trusted badge like the UL listing.
- Look for the UL mark on all electrical components.
- Confirm that the product is certified for outdoor use.
- Avoid knockoffs—non-certified products can be dangerous even if they look similar.
Using only gear that meets modern safety standards ensures your installation won’t short out during heavy rain or cause long-term issues underground. It’s not just about passing inspection—it’s peace of mind every time those lights flicker on.
Installation Techniques for Weatherproof Sealed Construction
Rainstorms, snowmelt, rogue sprinklers—your lights are gonna face it all. That’s why going full-on weatherproof is non-negotiable when installing driveway fixtures low to the earth.
• Use silicone-based sealants around fixture bases to prevent seepage into housing units.
• Select fixtures with built-in rubberized or compression-fit gaskets, especially where glass meets metal.
• Bury wires inside outdoor-rated PVC or metal conduit, not directly into soil—even if labeled as “underground rated.”
Also double-check the IP rating; aim for IP65 or higher if your area sees heavy downpours or irrigation runoff near the driveway edge.
Comparing Power Efficiency Between Systems (Scientific Table Selected)
To help you decide which system works better across different setups, here’s a quick comparison:
| Power Type | Avg Efficiency (%) | Initial Cost ($/fixture) | Maintenance Frequency |
|---|---|---|---|
| Low Voltage | 88 | $35 | Every 12–18 months |
| Direct Wiring | 95 | $50 | Every 24+ months |
| Solar Hybrid | ~70 | $40 | Every season |
This shows that while direct wiring offers better efficiency long-term, low voltage still strikes a balance between cost and ease—especially ideal when placing multiple small fixtures along a curved path or uneven terrain.
Real-Life Setup Tips For Ground-Level Fixtures
A few things folks often overlook when installing those sleek little ground lights:
– Always measure cable lengths before trenching—running short halfway through sucks big time.
– Double check polarity on low-voltage systems; reverse connections = no light at all.
– Don’t bury connectors directly; instead house them inside small waterproof boxes filled with dielectric grease to prevent corrosion over time.
These simple steps can save you hours of rework later—and keep your new setup shining bright through all four seasons.
Mistakes To Avoid When Installing Lights On Driveways
Here are some common screw-ups people make when setting up their new lighting system:
• Skipping waterproof connectors = eventual failure after first winter freeze-thaw cycle
• Using indoor-rated wire outside = cracked insulation within months under UV exposure
• Forgetting expansion gaps = crushed conduits when concrete shifts
Avoid these flubs by planning ahead and using only outdoor-rated materials designed specifically for driveways—not patios or gardens where conditions are less harsh.
Balancing Aesthetics With Functionality In Light Placement
You want those driveway lights looking sharp—but also doing their job safely and efficiently across every curve and turn of your pavement layout.
Group A – Visual Impact:
- Install symmetric pairs at entry points.
- Use warm white tones (~2700K) near landscaping borders.
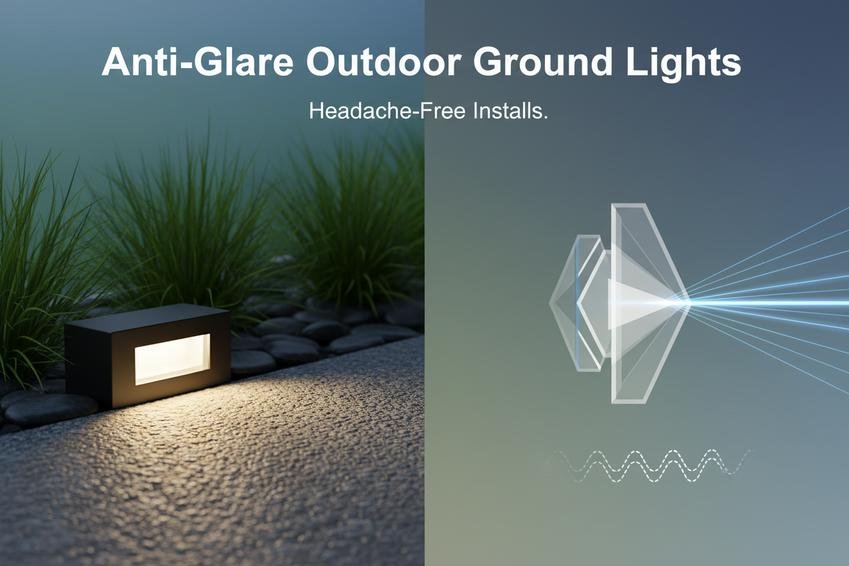
- Avoid glare by angling lenses downward slightly into gravel beds or turf edges.
Group B – Functional Coverage:
- Space evenly based on beam spread range (~6–8 ft apart).
- Add extra coverage at intersections or bends.
- Keep height flush with grade level to avoid tripping hazards but still stay visible under snow dustings or leaves buildup during fall season.
Done right, your setup won’t just glow—it’ll guide guests safely while making your home look way more high-end than it actually cost you.
5 Tips To Avoid Overlooking Driveway Lights On Ground Maintenance
Even tough-as-nails driveway lights on ground setups need some love. These five tips will help keep them glowing strong and steady year-round.
Regular Checks: Ensuring Long Lifespan of LED Driveway Lights
- Keep an eye on the wiring—loose or frayed connections can mess with your whole setup.
- Scan for flickers or dimming; it might signal failing components or moisture in the housing.
- Tug gently at each fixture to ensure it’s still anchored tight and hasn’t shifted due to weather or traffic.
- Check voltage levels monthly using a handheld multimeter.
- Inspect for corrosion around connectors, especially after heavy rain.
- Replace any cracked housings immediately—they invite water damage.
• Don’t forget to test timers and motion sensors if installed—they often get overlooked during routine checks.
A well-maintained light doesn’t just last longer—it works better and safer. Skipping regular inspections shortens the life of your system faster than you’d expect, especially when dealing with outdoor elements like snow, dirt, and heat fluctuations. According to a 2024 report by Outdoor Lighting Research Group, over 68% of premature failures in low-voltage lighting are linked directly to neglected maintenance routines.
Short-term neglect leads to long-term costs—simple as that.
Cleaning Tips: Keeping Durable Polycarbonate Lenses Clear
• Use only pH-neutral cleaning solutions—anything too acidic can fog up those tough polycarbonate lenses over time.
• A microfiber cloth is your best friend here; paper towels scratch more than you think.
• Rinse thoroughly after cleaning so no residue remains that could bake onto the lens under sunlight.
- Mix warm water with mild soap (no bleach).
- Gently scrub lenses once every two weeks during pollen-heavy seasons.
- Dry completely before reattaching covers or turning lights back on.
Avoid pressure washers near these fixtures—it’s overkill and risks damaging seals around your lights.
The clarity of your lights affects how much illumination hits the ground—and dirty lenses cut brightness by up to 40%, according to recent lab tests by Illumination Standards Institute (ISI) in May 2024. That’s not just about looks; it’s about safety too, especially along driveways where visibility matters most at night.
Replacing Batteries: When to Upgrade Rechargeable Lithium Power Sources
Group A – Signs You Need New Batteries:
- Dimming occurs even after full sun exposure.
- Lights shut off earlier than expected each night.
- You notice swelling in battery compartments—bad news!
Group B – Choosing Better Replacements:
- Opt for high-capacity rechargeable lithium cells rated above 2000mAh.
- Look for temperature-resistant models if you live somewhere that swings between freezing winters and blazing summers.
- Brands offering smart charge protection circuitry are worth the extra buck.
Battery upgrades aren’t just about replacing dead cells—they’re an opportunity to boost performance across all your outdoor lighting systems powered by solar or hybrid energy sources.
Don’t wait until you’re left stumbling in the dark; knowing when and how to upgrade your power game keeps those driveway markers shining through every season without fail—even during cloudy stretches when solar charging dips below optimal levels. MG Lighting recommends checking battery health biannually for best results across all models using lithium-based storage cells.
Choosing Quality: Avoid Cheap Driveway Lights Mistakes
Picking the right kind of driveway lights on ground isn’t just about looks—it’s about durability, safety, and saving money over time.

Sturdy Materials Matter: Benefits of Heavy-Duty Cast Iron
• Cheap plastic housings crack under pressure—literally. But heavy-duty materials like cast iron? They hold their own against bumps, weather, and wear.
• You’ll get more than just toughness; you get serious durability, especially if your lights are exposed to snowplows or lawnmowers.
• Thanks to its natural density, cast iron is also more stable in windy conditions—no tilting or shifting over time.
• And let’s not forget rust protection. Most quality models come pre-treated with a rust-resistant coating that holds up for years.
When it comes to long-term performance for your ground driveway lights, going with a sturdy base really pays off.
Energy Efficiency: Why Energy Star Certified Lights Are Worth the Investment
Energy Star-certified models aren’t just marketing fluff—they’re tested to meet real standards. According to the U.S. Department of Energy’s April 2024 report, certified LEDs use up to 90% less energy than incandescent options while lasting up to 25 times longer.
Short-term savings might tempt you toward cheaper units, but:
– Non-certified lights often draw more power per lumen output.
– They generate excess heat, which reduces lifespan and increases fire risk outdoors.
Plus, most modern Energy Star driveway fixtures include smart sensors that adjust brightness based on ambient light—cutting down unnecessary power use at night when no one’s around.
So yeah, investing in an efficient system means lower bills and fewer bulb swaps down the line—a real win-win for any homeowner lighting their path with driveway lights on ground setups.
Understanding Certifications: The Importance of RoHS Compliant Products
Break this down into three key parts:
- RoHS stands for Restriction of Hazardous Substances.
- It bans things like lead and mercury from electronics—including outdoor lighting.
- Why should you care? Because non-compliant products can leach harmful chemicals into soil or groundwater near your home.
A RoHS label doesn’t just mean cleaner manufacturing—it tells you the product meets strict European environmental standards too.
For anyone installing outdoor lighting near gardens or kids’ play areas, picking a RoHS-compliant setup isn’t optional—it’s essential for peace of mind and long-term safety around your property’s edge where those discreet little ground driveway lights are often placed.
Comparing Costs: Why Investing in Quality Saves Money Long-Term
Let’s break this one into two buckets:
Upfront Costs:
– Yes, premium-grade ground fixtures cost more initially—especially ones made with solid aluminum or cast iron bodies.
Long-Term Savings:
– Lower failure rates mean fewer replacements every season.
– Better seals mean less water damage—no flickering after rainstorms.
– LED-based systems cut power bills dramatically over time.
– Maintenance? Practically none if you go quality from day one.
It’s easy to be lured by $10 solar spikes online—but ask anyone who had to replace them every spring how much they actually saved.
A solid investment upfront means your driveway lights on ground don’t become a recurring hassle—and instead become reliable features that last through seasons without skipping a beat.
FAQs about Driveway Lights on Ground
What are the biggest mistakes people make when installing driveway lights on ground?
The most common errors aren’t technical—they’re human. People often underestimate how much light they actually need, or they rush placement without thinking through how shadows will fall at night. A few missteps can leave a beautiful driveway looking patchy and dim.
- Spacing lights too far apart creates dark gaps that feel unsafe
- Using non-weatherproof materials leads to early corrosion or electrical failure
- Forgetting local codes may result in costly rework
It’s not just about plugging them in—it’s about designing with intention.
Can solar-powered driveway lights survive harsh winters?
Only some can handle it—and those are built like little tanks. If you live where snow piles high and temperatures drop low, look for these features:
- Sealed aluminum alloy housing to resist moisture and salt
- Lithium batteries rated for cold weather performance
- Solar panels angled to catch weak winter sun
Without this kind of durability, your “year-round” lighting might flicker out by January.
How do I avoid uneven lighting along my driveway?
Picture walking down your path at night—some areas glow warmly while others vanish into shadow. That happens when spacing is off or brightness levels don’t match the layout. The fix?
Start by mapping out your space before buying anything. Measure distances between fixtures so each one casts enough overlap with its neighbor. Don’t rely on guesswork; test placements using temporary setups if needed.
Even spacing isn’t always equal spacing—curves, slopes, and landscaping all affect how light behaves across the surface.
Why do certifications matter when buying bulk quantities of ground-level lights?
Because cutting corners gets expensive fast—especially in commercial applications where safety inspections happen regularly. Certified products give peace of mind that you’re meeting standards right from installation day:
- UL-listed means tested for fire/electrical safety under real conditions
- RoHS compliance ensures no harmful materials leach into soil over time
- DLC Premium listings may qualify for energy rebates
In short: certified equals trusted—and trust matters more than ever when you’re wiring dozens (or hundreds) of units underground.
What features should professionals prioritize in heavy-use driveways?When cars roll over these fixtures daily—or even hourly—you need more than pretty design:
Durability is king:• Thick tempered glass lenses resist cracking under pressure
• Impact-rated housings shrug off tire weight
• Waterproof seals prevent short circuits during storms
And don’t forget smart controls: dusk-to-dawn sensors save electricity automatically while keeping pathways lit exactly when needed—all without flipping switches manually every evening.