Maintaining and Cleaning LED Garden Lights Outdoor Solar for Longevity
Solar garden lights rarely fail all at once. They dim, run shorter, work some nights and skip others, and only then stop turning on. The fastest way to extend the useful life of your led garden lights outdoor solar is to work in a simple order: clean the panel, protect the battery, check the location, and inspect the connections before you blame the fixture. Most underperforming solar lights are fixed with soapy water, a few minutes of trimming, or a fresh rechargeable battery, not a new purchase. This guide walks through each maintenance step, gives you a year-round schedule, and closes with a troubleshooting order that stops you from replacing parts at random.
How to Tell Your Solar Lights Need Maintenance
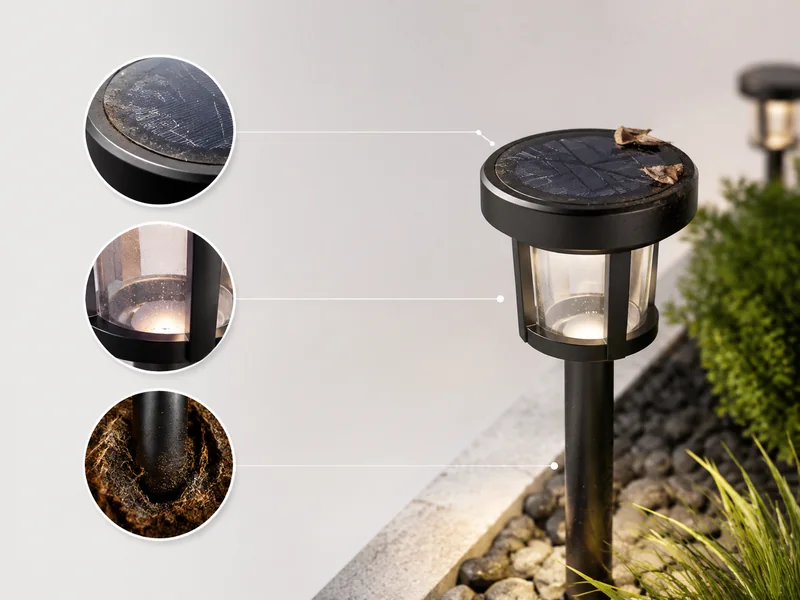
You do not need a multimeter or a technical background to know when a solar garden light needs attention. You need to notice which symptom you are seeing, because each symptom points at a different part of the system. The earlier you catch the symptom, the cheaper the fix usually is.
- Dim or shortened output: The light comes on, but it is noticeably fainter than it was, or it shuts off earlier than it used to. That combination usually means the panel is charging less or the battery is aging. It is the earliest and most common maintenance trigger, and it is worth acting on before the light fails completely.
- Intermittent operation: A light that works some nights and skips others is usually telling you the battery is tired or a connection is loose, not that the LED has failed. Intermittent faults are worth investigating because they are often cheap fixes. A loose connector can be re-seated by hand; a weak battery can be replaced in minutes.
- No light at all after a full sunny day: Before you assume the fixture is dead, check the panel, the location, the battery, and the connections in that order. A surprising number of dead-looking lights recover after a clean or a move, so a no-light condition is a starting point, not a verdict.
- Visible grime on the panel: Dust, pollen, bird droppings, and sticky films reduce the amount of sunlight a panel can capture. If you can see dirt, the light is already losing output. Cleaning is not optional touch-up at that point; it is the fix. A panel that is only half covered can still cast the whole light into short runtime.
- Debris and shade: Fallen leaves, overgrown branches, or a fixture that has settled into shadow cut charging hours even when the panel itself is clean. When output drops after a windy day or a growing season, look around the light before you look inside it. A leaf sitting on the panel for a week can block a meaningful share of a small panel’s surface.
- Normal seasonal dimming: Shorter days and cloudy stretches naturally shorten runtime. Solar lights run later in June than in December, and comparing current behavior with the sunniest month of the year is the fair test. If a light improved when summer came back, it may never have needed a repair.
The same logic applies to a whole string of lights. If one fixture in a row is fine and its neighbor is weak, the problem is nearly always local: the weak light’s panel, its battery, its placement, or its connection. When every light in the yard dims at the same time, the cause is usually shared, such as a stretch of cloudy weather or a tree that grew enough to shade the whole run. That distinction tells you where to spend your effort.
Step-by-Step: How to Clean Solar Panels, Glass, and Fixture Housings
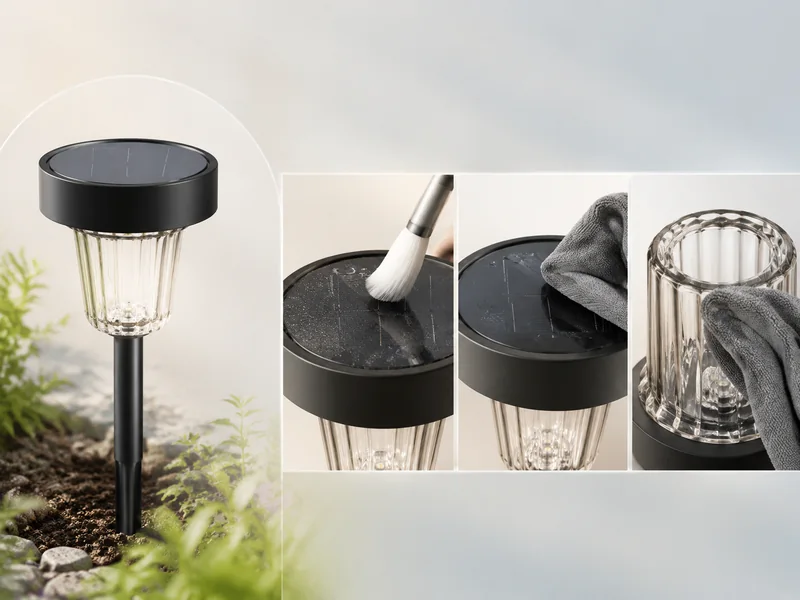
Clean solar panels with a soft-bristled brush for loose debris, then a non-abrasive cloth dipped in mild soapy water, then rinse with a damp cloth and dry. The whole job takes a few minutes per fixture, and the only hard rule is to keep water out of seams, switches, and sensor windows. The efficiency of a solar light depends on how much sunlight the panel can capture, and a panel that is covered in dirt will not perform at full capacity no matter how good the battery is.
- Inspect before you wipe. Look for cracks, moisture inside the lens, and loose parts. If water has already entered the housing, cleaning will not fix the fault, and replacement is the realistic outcome. Cleaning a damaged fixture can push dirt or moisture deeper into the opening.
- Dust first. Use a soft-bristled brush or a dry microfiber cloth to remove loose grit. This step matters because dry dust is made of abrasive particles; wiping it across the panel with a wet cloth can leave fine scratches that cloud the surface over time.
- Wash the panel. Dip a non-abrasive cloth in warm water with a few drops of mild dish soap and wipe the full surface with gentle, overlapping strokes. Keep the cloth damp, not soaking, so water does not run into the seams. You do not need a specialty solar panel cleaner; mild soapy water is the simplest thing to reach for because it does not leave a film.
- Rinse and dry. Rinse with a damp cloth or a very light spray, then dry with a soft cloth. Never blast water into seams, hinges, or switch areas, and never submerge a fixture unless its rating says it can handle immersion. A quick dry also prevents water spots that can make a clean panel look dirty again.
- Clean the glass or globe the same way. A hazed or dirty lens cuts visible light even when the panel is spotless. The lens is part of the glowing fixture, not just the panel, so it deserves the same gentle treatment. Use a soft cloth and dry it fully so minerals in the water do not leave streaks.
- Match your methods to the fixture’s IP rating. The IP (Ingress Protection) code is defined by the International Electrotechnical Commission in IEC 60529 and describes how well a housing resists dust and water. The first digit covers solid particles; the second covers water. An IP67 fixture, for example, is protected against dust and can handle immersion in fresh water to about one meter for up to 30 minutes, while a fixture with a low second digit is built only for dripping water, not a hose. Water ratings are not cumulative, so a fixture that passes the immersion test is not automatically rated for high-pressure jets. If your fixture has no readable rating, treat it as low-rated and clean it with a damp cloth only.
- Use the cleaning pass as a damage check. Note corrosion, cracks, or water ingress while you are handling each fixture. A small crack around the lens or a greenish crust on the terminals is much easier to address now than after a winter of moisture.
If you clean several lights at once, do the panels first and the lenses immediately after, before you lose track of which fixture is which. Cleaning once a month during the growing season and after every major storm keeps the routine from becoming a full afternoon project.
Battery Care: Charge, Let It Rest, and Replace at the Right Time
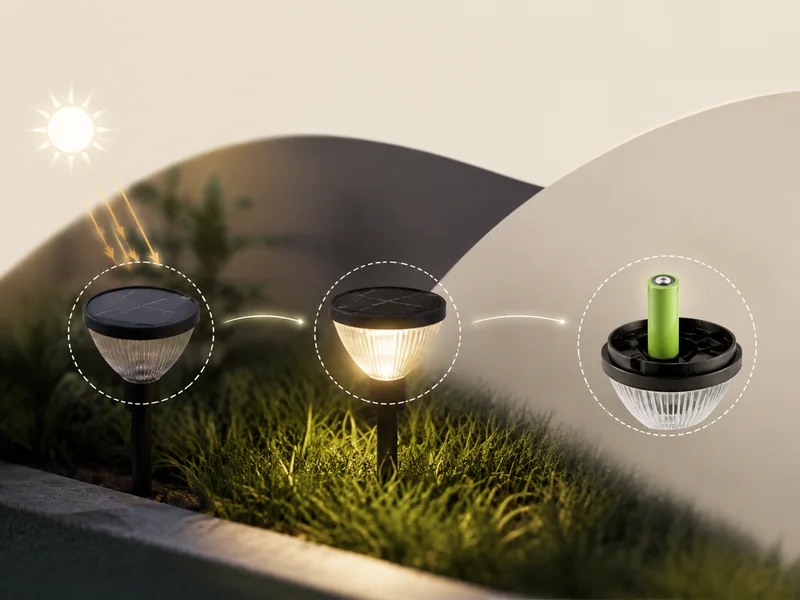
Battery care comes down to four habits: charge fully before first use, avoid long idle spells, give the battery a rest, and replace it when performance stays poor after full sunny days. The battery is an essential part of the system and, like any rechargeable cell, it has a limited service life. It is also the part owners often misdiagnose first.
- Charge fully before first use. Follow the manufacturer’s first-use instruction, which usually means letting a new light sit in full sun with the switch off so the battery starts its first night topped up.
- Avoid long idle spells. If a fixture will sit unused for weeks, switch it off rather than letting it drain slowly. The point is not to avoid using the light; it is to avoid leaving it in a half-charged state for months. This matters most for lights that are seasonal or for fixtures stored over winter.
- Give the battery a rest now and then. Switching a fixture off for two or three clear days lets the panel refill the battery without the LED drawing it down. This can revive a light whose runtime has slowly shrunk, and it is a free test before you spend money on a replacement.
- Turn fixtures off during extended rain. On cloudy, rainy days the panel cannot refill what the bulb drains. If your fixture has a manual on/off switch, use it during long wet spells so the battery is not being drained night after night while it cannot recharge. A battery that is pulled down repeatedly without a full recharge will not serve you well for long.
- Identify the battery before you replace it. Remove the battery and read the printing on it for type, size, and voltage. The label is the best guide to the correct replacement, so photograph it or take it with you. Do not assume that any rechargeable battery of the right size will do; the printed label tells you what the fixture expects, and matching it is the reliable move.
- Replace based on clear signs. Corrosion is a common sign that a battery is approaching the end of its life, and so is poor performance that does not improve: the light stays dim after a full sunny day, dies well before dawn, works only some nights, or will not run at all after the panel and location check out. Notice the combination. A single dim night after a storm is not a battery problem; the same behavior after three sunny days is.
- Dispose of old batteries responsibly. Do not puncture, crush, or burn them, and do not assume they belong in household trash. Battery recycling rules vary by municipality, so check the drop-off locations near you. Many home improvement stores and recycling centers accept rechargeable batteries.
One habit saves more batteries than anything else: hold the fixture in your hand before you judge it. If the panel is dirty, the light is in shade, or the switch has been left on during a rainy week, the battery may be fine. Rule those out first, and you will replace far fewer cells.
Inspect Wires, Connections, and Fixture Hardware
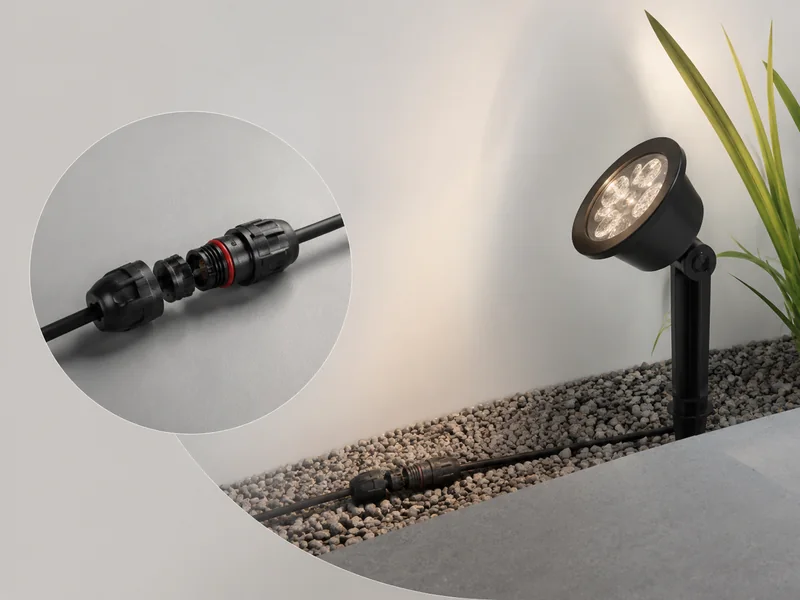
Beyond the panel and battery, most silent failures happen in wires, connections, housings, and the base. These parts fail without an obvious symptom, which is why they deserve a visual check on the same day you clean the panel.
- Trace the wires. Check the cable where it enters the housing and along the stake for chew marks, cut marks, or wear from rubbing against hard edges. Outdoor animals are a common cause of wire damage, and string trimmers can slice low cables without any visible sign from the front of the light. If you find damage, note it and stop; this is not a repair to improvise.
- Look for corrosion. A whitish or greenish crust on battery terminals, connectors, or contact points is one of the most common causes of intermittent or dead fixtures. Corrosion is a sign that the part is nearing the end of its life, and cleaning it usually is not a long-term fix. Wiping it away can buy a little time, but the correct response is replacement of the affected part or battery.
- Confirm connections are seated. A connector that has worked loose can be re-seated by hand if it is undamaged. Press it together until you feel it click, then tug gently to confirm. If the connector is corroded or broken, stop there; forcing a damaged connector can make the problem worse and can risk the light entirely.
- Inspect the housing and lens for cracks. Cracks let water inside, and water inside a fixture causes corrosion and shorts even when the panel and battery are fine. Look for hairline cracks along seams, around the lens, and where the stake meets the housing. Moisture inside the lens is the clearest warning sign and usually means the seal has failed.
- Keep the base clear. Make sure the fixture is not sitting in standing water, buried in mulch, or pressed flat against wet ground. Moisture trapped against the housing accelerates corrosion faster than rain does, and soggy mulch can keep the base damp for days after the sun comes out.
- Know the boundary between maintenance and repair. Re-seating an undamaged connection is reasonable owner maintenance. Cutting, splicing, or rewiring solar-light components is not a safe DIY repair; use the manufacturer’s guidance or a qualified professional for anything beyond basic inspection. This boundary protects you and the fixture.
A good inspection does not have to be long. Forty-five seconds per fixture, done while you are already there with a cloth, is enough to spot the problems that turn into failures by mid-summer.
Review the Location: Sunlight, Shade, and Clean Surroundings
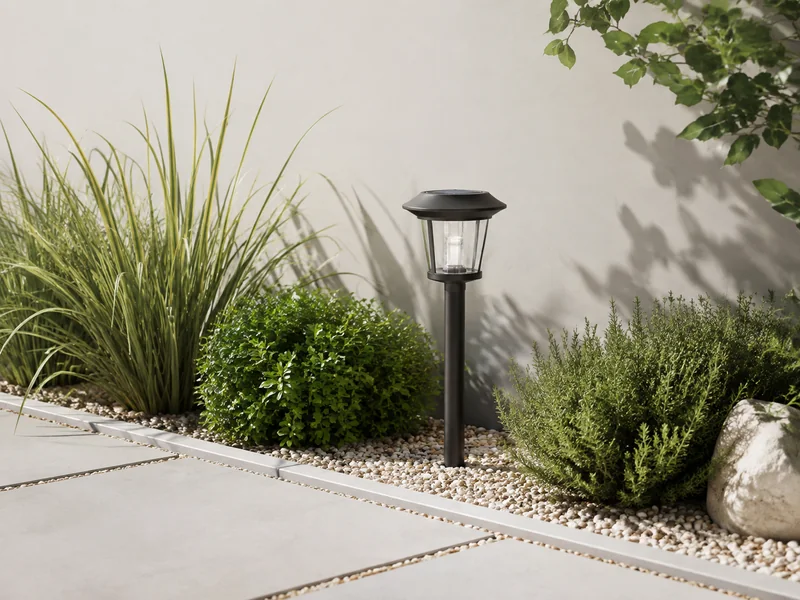
A clean light sitting in shade still will not charge. Before you order replacement parts, audit the location, because the panel needs unobstructed direct sunlight for most of the day.
- Start with direct sun. Even a few hours of shade can meaningfully shorten evening runtime. The question is not whether the area looks bright; it is whether the panel itself sees the sun. A light on the north side of a house can be in shade all day while the rest of the yard blazes.
- Walk the area at different times of day. A spot that is sunny at noon is often shaded by the house, fence, or a tree by late afternoon, exactly when the panel needs its final charge. Check your fixtures at midday and again in late afternoon on a clear day. The difference between those two snapshots will tell you more than any product specification.
- Prune and clear. Trim overhanging branches, keep shrubs back, and pick up leaves and debris so nothing sits on the panel or blocks its view of the sun. This applies to stake lights, fixtures mounted on retaining walls, and lights around pool decks, where shadows from walls and furniture appear quickly.
- Account for the seasonal sun path. Winter sun sits lower in the sky, so a spot that works in summer can fall into shadow in fall and winter. Expect to adjust placement by season rather than setting it once. A fixture that worked from April through September may need to move two feet in October.
- Run a relocation test before spending money. Move a struggling fixture into a sunnier spot for a few days and watch whether runtime improves. If it does, the location, not the light, was the problem. This is the cheapest diagnostic test in solar lighting.
- Set the panel angle after any move. If the panel tilts, aim it roughly toward the midday sun path, generally south-facing in most of the U.S., and wipe it clean once it is repositioned. An angled panel that faces the wrong direction can lose hours of charging even in full sun.
Location problems are the easiest to mistake for hardware failure. A light that sits under a tree that grew three feet taller over the summer will behave exactly like a light with a dead battery. Keep that in mind before you order parts.
A Seasonal Maintenance Routine That Keeps Solar Lights Brighter Longer
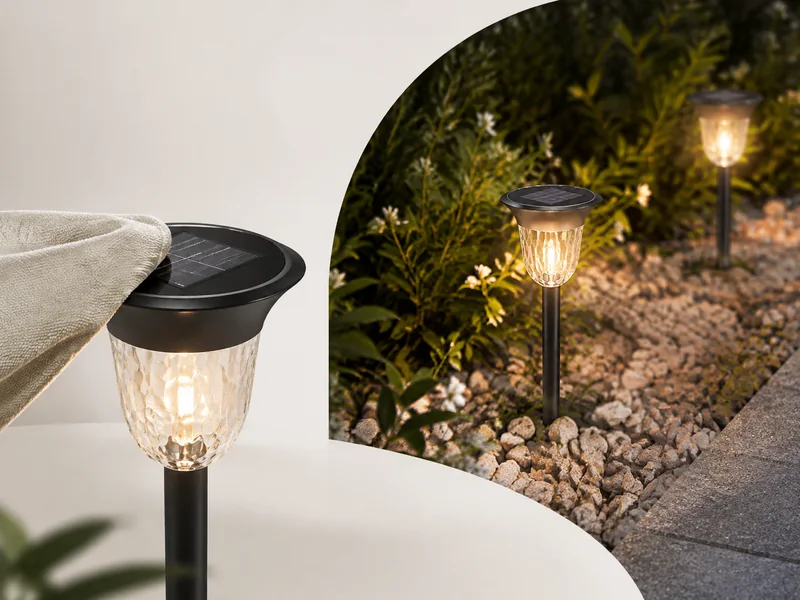
The routine has three layers: a quick visual check every week or two, a full clean and battery check monthly, and season-specific work when the calendar changes charging, debris, and moisture. Dirty panels cut charge, chronically drained batteries age faster, and moisture sitting on connections causes corrosion. Every row in the table targets one of those failure paths before it becomes a replacement.
| Task | Weekly / every other week | Monthly | Spring | Summer | Fall | Winter |
|---|---|---|---|---|---|---|
| Panels and lenses | Wipe off dust, pollen, and debris | Full clean with mild soapy water, rinse, and dry | Deep-clean the film left by winter and inspect after storage | Wipe more often during dry, dusty weeks | Clear leaves and sap after storms | Clear snow after storms or store removable fixtures inside |
| Battery | Watch runtime for sudden drops | Confirm runtime still matches the season | Check for corrosion and charge fully after any long storage | Look for swelling, leakage, or terminal crust | Decide before frost whether fixtures will be stored | Remove batteries if you bring fixtures inside |
| Wires and connections | Quick visual check of cables and terminals | Inspect connectors, wires, and housing seals | Check for animal damage from the cold months | Inspect after string-trimmer season | Re-seat dry, undamaged connections | Inspect before storage or before heavy rain season |
| Vegetation and debris | Clear anything sitting on the panel | Trim growth that is close to fixtures | Prune branches as the sun path rises | Keep grass and weeds away from low fixtures | Remove fallen leaves repeatedly | Keep snow from blocking panels |
| Weather handling | Check after heavy storms | — | Confirm fixtures that stayed out are still sealed | — | Use manual-off mode during long wet spells | Use manual-off during rainy stretches; store removable fixtures in snow climates |
The weekly pass is about prevention. You are not deep-cleaning; you are catching the leaf that landed on a panel that morning and the fixture that tipped over in the wind before they become next week’s problem.
The monthly pass is about performance. A full clean, a runtime check, and a five-minute look at wires and terminals tell you whether the light is still doing its job. If runtime has dropped and the panel is clean, the battery or the location is the suspect.
The seasonal passes are about the calendar. In spring, winter film and animal damage are the main concerns. In summer, dust and fast-growing grass shorten the interval between cleanings. In fall, leaves and a lower sun path make trimming urgent. In winter, snow climates call for either clearing panels or bringing removable fixtures inside, and mild rainy climates call for using the manual off switch during long wet spells. You do not have to do every row every week; you have to know which row matters in the season you are in.
Troubleshoot Solar Garden Lights in the Right Order
When a fixture still will not work after a clean, work this order: panel, location, battery, connections, fixture. Testing in order stops you from replacing a good battery or a good LED while the real problem is a dirty panel or a shaded spot.
- Panel first. Clean it, check for cracks or hazing, and retest. The panel is the energy source, so a dirty or damaged panel starves everything downstream. If the panel is cracked or water has gotten behind it, no amount of battery care will help.
- Location second. Re-check sun exposure for a couple of days. The fix is free, and many seemingly dead lights recover after a simple move. Run the relocation test from the location section before you spend money.
- Battery third. After a full day of sun with a clean panel and a sunny spot, a dim, intermittent, or dead light is most likely a battery problem. Test the light on a sunny day, then replace the battery with one that matches the printed label if performance does not improve.
- Connections fourth. Re-seat any undamaged connector by hand, look for corrosion, and check the wires for animal or branch damage. This step catches the intermittent failures that a single-night test misses.
- Fixture last. If the panel, location, battery, and connections all check out, the LED, sensor, or switch has likely failed. On many basic solar fixtures, the cost and effort of repairing those internals outweighs the fixture’s purchase price, so replacement is often the practical call.
Keep a short log of what you checked and under what sky conditions. For intermittent faults, a few nights of notes will reveal the pattern faster than guessing, and it will stop you from replacing the same part twice.
| Symptom | Most likely causes, in check order | Safe owner action |
|---|---|---|
| Won’t turn on after a sunny day | Dirty or cracked panel; shaded location; dead or corroded battery; loose connection; failed LED or sensor | Clean the panel, move the fixture to full sun for two days, test the battery, re-seat dry connections, then consider replacement |
| Dim or shorter runtime | Dirty panel; shade; aging battery; cloudy-season charging | Clean and reposition the fixture, let it charge a full sunny day, then replace the battery if runtime stays short |
| Works some nights, not others | Tired battery; loose or corroded connection; shifting shade | Watch for three nights, check and re-seat connections, replace the battery if the pattern continues |
| Flickering | Loose connection; corroded terminals; moisture inside the housing | Dry the terminals, re-seat connections, and inspect the lens and seals for cracks |
| Fails after rain | Water ingress; low charge from cloudy days | Wipe the fixture dry, check the seals, and use the manual off switch during long wet spells |
The replacement decision is where the routine stops being about cleaning and starts being about direction. A new solar fixture makes sense when the spot gets real direct sun and you will keep up with the cleaning and battery routine. A 12-volt low-voltage landscape lighting system changes the math: systems like that pair with Energy Star certified drivers, use corrosion-resistant materials such as stainless steel and composite, include waterproof connectors, and offer photocell and dimmable controls, so they remove the two solar-specific chores, panel cleaning and battery swapping, from the list.
Most solar garden lights do not need to be replaced; they need to be cleaned, moved, or given a fresh battery. Run the five checks in order, keep the weekly and monthly rows of the schedule, and you will catch fixable issues while they are still small. When a fixture finally fails after all five checks pass, the decision is clearer: buy another solar light only if the location gets real sun and you are willing to keep up the routine, or compare a wired alternative. Low-voltage landscape lighting is worth reviewing at that point because it takes panel cleaning and battery swaps off your list entirely. Either way, observe first, test the cheap fixes first, and replace only when the evidence says the fixture itself is done.